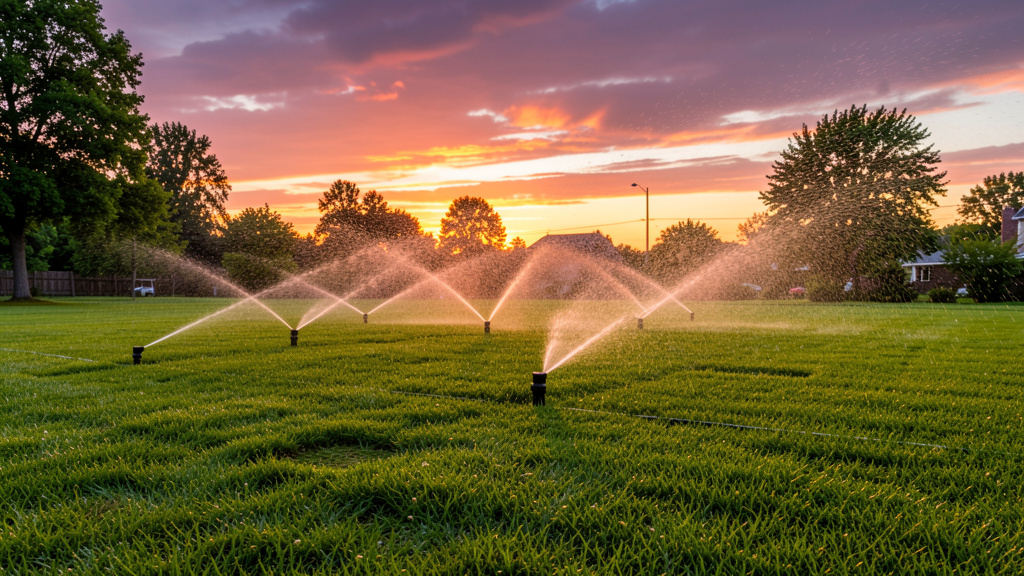
Design, Install, and Maintain a Water-Wise System That Saves Time, Money, and Precious Resources
Imagine waking to a garden thriving in vibrant health—not because you spent your morning hauling hoses, but because a silent, intelligent system delivered exactly the right amount of water, precisely where needed, while you slept. This isn’t a luxury reserved for estates or tech enthusiasts. It’s the tangible reality of a thoughtfully designed irrigation system. According to water conservation research and agricultural extension resources, inefficient watering practices can lead to significant water loss in residential landscapes. This guide transforms awareness into actionable strategy: nurturing deeper root systems, reducing maintenance demands, supporting watershed health, and cultivating a garden that flourishes through intentional design. No prior plumbing experience required—only curiosity, observation, and a commitment to working with your landscape’s natural rhythms.
Introduction: Why “Just Watering” Costs More Than You Think
Water sustains life, but how we deliver it shapes plant resilience, soil vitality, your time, your resources, and our shared environment. Many gardeners operate under well-intentioned assumptions: “More water equals lusher growth,” “Hose watering is simplest,” or “All irrigation systems perform similarly.” These perspectives often lead to shallow roots vulnerable to drought stress, fungal issues from prolonged foliage moisture, soil erosion on slopes, unexpected spikes in utility usage, and the quiet frustration of watching runoff carry nutrients—and effort—away.
Consider tomato plants experiencing inconsistent soil moisture: fruit may develop cracks following sudden rehydration after dry periods. Or newly seeded areas washed bare by an overly aggressive sprinkler cycle. These aren’t reflections of effort; they’re signals of system misalignment. True efficiency isn’t arbitrarily using less water—it’s delivering the appropriate amount at the appropriate time to the appropriate location. This requires shifting from reactive watering to proactive landscape understanding. Research from land-grant institutions and cooperative extensions indicates that gardens implementing zone-based, soil-informed irrigation strategies often experience meaningful improvements in water use efficiency, plant vitality, and reduced disease pressure compared to inconsistent manual methods. This guide synthesizes established horticultural principles, engineering considerations, and practical adaptation strategies into a cohesive framework. We’ll move step-by-step from listening to your garden’s unique conditions to building a responsive system grounded in observation. Only curiosity, patience, and a willingness to learn are required.
The Water-Wise Framework: Three Layers for Enduring Efficiency
Forget fragmented tips. Sustainable irrigation rests on three interdependent layers. Overlooking one compromises the whole. Mastering all three cultivates resilience that adapts across seasons, conserves resources year after year, and deepens your connection to the living systems you steward. This is cultivation intelligence in action.
The Fundamental Principle: Efficiency emerges where garden ecology informs thoughtful design. Water is the messenger; your system is the translator.
Layer 1: The Foundation – Decoding Your Garden’s Unique Hydrology
Before selecting a single component, become a careful observer of your landscape. This layer replaces guesswork with grounded understanding. Rushing this phase often leads to uneven growth, wasted effort, and recurring adjustments. Dedicating focused time here establishes clarity that pays dividends throughout the system’s life.
Soil Texture Analysis: Understanding Water Movement
Soil composition fundamentally influences infiltration rate, moisture retention, and root development.
– Why it matters: Sandy soils (larger particles) drain rapidly—water may move beyond root zones before absorption, often requiring shorter, more frequent application cycles. Clay soils (finer particles) retain moisture longer but drain slowly; excessive application can limit oxygen availability to roots. Loam (a balanced mix) offers favorable characteristics but varies across properties. Misalignment between soil type and watering approach creates chronic stress: plants in sandy areas may show drought symptoms despite frequent watering; plants in heavy clay may struggle with saturated conditions even with moderate application.
– How to assess (Jar Test Method):
1. Collect soil samples from 6 inches deep in multiple garden areas (avoid surface debris).
2. Place 1 cup of soil in a clear quart jar; fill ¾ full with water. Add 1 tsp dish soap to help separate particles.
3. Shake vigorously for 3 minutes. Let settle undisturbed.
4. After 1 minute: Sand settles (bottom layer).
5. After 4 hours: Silt layer forms.
6. After 24 hours: Clay layer appears (top). Organic matter may float.
7. Measure layer heights to estimate relative proportions.
– Interpretation guidance:
– Predominantly sandy: Drip irrigation with shorter, more frequent cycles may support moisture availability. Incorporating organic matter annually can gradually improve water-holding capacity.
– Predominantly clay: Low-flow drip or soaker hoses applied slowly allow time for infiltration. Avoid high-volume sprinklers on slopes to minimize runoff. Aerating compacted areas before installation can enhance effectiveness.
– Loamy mix: Offers flexibility for multiple system types. Monitor closely during extended heat or wind events.
– Key insight: Soil varies across a single property. Test near foundations (often compacted), garden beds, and lawn edges. Sketching results creates a valuable reference map.
Sun Exposure & Microclimate Mapping: Accounting for Evaporation Variables
Sun exposure interacts with wind, slope, and surrounding structures to create localized conditions. A south-facing slope loses moisture faster than a shaded northern bed. Wind corridors accelerate drying; low-lying areas may retain cooler, moister air.
– How to map:
1. Use a property sketch noting cardinal directions.
2. Observe at 9 AM, 1 PM, and 5 PM on a clear day. Shade areas:
– Full sun: 6+ hours direct sun
– Partial sun: 3–6 hours
– Full shade: <3 hours
3. Note wind patterns (where debris collects or moves), heat-reflective surfaces (patio stones, light-colored walls), and low spots where cool air settles.
– Practical application: Roses against a west-facing brick wall typically require more frequent moisture than identical varieties in open eastern exposure. Vegetable beds sheltered by fencing retain moisture longer. Your irrigation zones should reflect these micro-variations. Grouping all “full sun” plants together without considering microclimates is a common oversight.
– Seasonal awareness: Deciduous trees create shifting light patterns—full sun in early spring, dense shade by midsummer. Note these transitions; controller schedules benefit from quarterly review.
Plant Water Needs Inventory: Grouping by Hydrological Compatibility
Plants communicate need through physiology, not preference. Grouping solely by appearance or botanical family overlooks critical moisture requirements.
– Develop a water-needs reference:
| Plant Category | Examples | Typical Summer Frequency | Root Depth Consideration | Key Insight |
|———————|——————————|————————–|————————–|————————————–|
| Higher Need | Basil, Lettuce, Hydrangeas | More frequent | Shallow (6–12″) | Wilts readily; sensitive to dry spells |
| Moderate Need | Tomatoes, Roses, Daylilies | Moderate | Medium (12–18″) | Deep, infrequent watering encourages root depth |
| Lower Need | Lavender, Rosemary, Sedum | Less frequent | Deeper (18″+) | Vulnerable to prolonged saturation; requires sharp drainage |
| Arid-Adapted | Agave, Yucca, Russian Sage | Minimal | Extensive (24″+) | Thrives with infrequent deep watering; mimics native conditions |
– Why grouping matters: Combining high- and low-water plants in one zone creates conflict. Lavender kept moist for nearby basil risks root issues; basil restricted for lavender’s sake shows stress. Hydrozoning—grouping plants with similar moisture needs—is essential for efficient, healthy irrigation. Sketch beds and color-code by category. Adjust plant placement before installation if zones conflict.
– Thoughtful adaptation: In mixed “cottage garden” beds, position drought-tolerant thyme on a slightly raised area (improving drainage) with a dedicated emitter line, while placing moisture-loving delphiniums in a lower, naturally moister zone. Work with plant biology.
Water Source Assessment: Understanding Flow and Pressure Realities
Your system’s performance is bounded by your water source. Ignoring this leads to frustration.
– Measure flow rate (GPM):
1. Place a 5-gallon bucket under an outdoor spigot.
2. Time fill duration.
3. Calculate: (60 seconds ÷ Fill time in seconds) × 5 = GPM.
Example: Fills in 30 seconds → (60/30)×5 = 10 GPM.
– Measure pressure (PSI):
Attach an affordable pressure gauge to the spigot. Note static pressure (no flow) and dynamic pressure (while water runs).
– Practical thresholds:
– < 20 PSI (dynamic): Low pressure. Drip or micro-sprayers are often more suitable than spray heads. A pressure booster may be considered after professional consultation.
– 20–50 PSI: Suitable for many systems. A pressure regulator is generally recommended for drip zones.
– > 80 PSI: High risk of component stress or misting (increasing evaporation loss). A pressure regulator is typically essential.
– Water quality note: Fill a clear container; observe after 24 hours. Sediment, discoloration, or mineral deposits suggest filtration needs. Well water often benefits from filtration; municipal water may contain additives affecting soil biology over time.
– Critical reminder: Dynamic pressure (measured while water flows) is what matters for system design. Static pressure alone can be misleading. If dynamic pressure is consistently low, consult a qualified professional to assess household plumbing constraints.
Slope & Drainage Assessment: Working With Topography
Water follows gravity. On slopes, unmanaged flow leads to runoff and erosion.
– Simple slope estimation:
1. Place stakes 10 feet apart along the slope.
2. Use a level string at the top stake height.
3. Measure vertical drop at the lower stake.
4. Calculate: (Drop in feet ÷ Distance in feet) × 100 = % slope.
Example: 1-foot drop over 10 feet → (1/10)×100 = 10% slope.
– Topography-informed approaches:
– 0–5% (Gentle): Standard drip or low-angle sprinklers often perform well.
– 5–15% (Moderate): Drip with pressure-compensating emitters is advantageous. Run lines contouring the slope (level), not vertically. Check valves can prevent post-shutoff drainage from lower emitters.
– >15% (Steep): Terracing provides ideal conditions. Where not feasible, drip with closer emitter spacing on the downhill side of plants helps compensate for water migration. Sprinklers generally increase erosion risk on steeper slopes.
– Drainage observation: Dig a 1-foot-deep hole. Fill with water. Note drainage time:
– < 4 hours: Rapid drainage (sandy). May require more frequent application.
– 4–12 hours: Moderate drainage (loam). Suitable for diverse plantings.
– > 24 hours: Slow drainage (clay). Amend soil where possible; avoid subsurface lines that could trap water; surface drip with longer intervals between cycles may be preferable.
Layer 2: The Blueprint – Precision System Design for Maximum Impact
With Layer 1 insights documented, design becomes a logical extension of observation. Print your annotated garden sketch. Overlay irrigation strategy thoughtfully.
Choosing Your System Type: Aligning Technology With Landscape Needs
No single system suits all situations. The optimal choice harmonizes with your site assessment.
| System Type | Well-Suited For | Relative Efficiency Notes | Core Components | Important Considerations |
|---|---|---|---|---|
| Drip Irrigation | Vegetable beds, shrubs, trees, slopes, clay soil | High targeted delivery | Tubing, emitters, filter, regulator | Requires filtration; tubing visible unless mulched |
| Soaker Hoses | Straight rows, informal beds | Moderate | Porous hose, end cap | Output less uniform on slopes; degrades with UV exposure |
| Bubbler Systems | Trees, shrubs, container groupings | Moderate to High | Bubbler heads, risers, valves | Not designed for turf; precise placement needed |
| Rotor Sprinklers | Large turf areas (>15 ft radius) | Moderate (when optimized) | Rotors, valves, controller | Wind affects pattern; runoff risk on clay/slopes; wets foliage |
| Spray Heads | Small turf areas, narrow strips | Lower | Spray heads, valves | Higher evaporation loss; runoff risk; less efficient on slopes |
| Micro-Sprayers | Groundcover, dense perennial plantings | Moderate | Micro-sprayers, stakes | Sensitive to wind and clogging; not for turf |
- Drip irrigation deep dive
Drip applies water slowly (typically 0.5–2 GPH per emitter) directly to root zones. Benefits include: - Soil preservation: Minimizes compaction and erosion.
- Weed reduction: Water targets desired plants, not pathways.
- Disease mitigation: Keeps foliage dry, reducing conditions favorable to fungal pathogens.
- Precision: Emitters placed according to individual plant needs.
- Pressure compensation: For slopes or runs exceeding 25 feet, pressure-compensating (PC) emitters help maintain uniform output regardless of elevation changes.
- Emitter spacing considerations:
- Sandy soils: Closer spacing (e.g., 12″)—water moves downward more readily.
- Clay soils: Wider spacing (e.g., 18–24″)—water spreads laterally.
- New plantings: Position emitters near the current root ball; adjust outward as roots expand.
-
Installation note: Run ½” mainline tubing along bed edges. Use a punch tool for clean holes. Insert ¼” feeder lines to plants. Seal unused ports with goof plugs. Anchor tubing with landscape staples every few feet, especially on slopes.
-
Optimizing sprinkler applications
Turf and groundcover sometimes require overhead coverage. To improve efficiency: - Matched precipitation rate (MPR) rotors: These apply water slowly (typically 0.4–0.6 inches/hour), better matching soil infiltration rates than standard spray heads, reducing runoff risk.
- Head-to-head coverage: Each sprinkler should spray to the next head’s location. This ensures even coverage; edge areas receive adequate water.
- Wind considerations: Schedule watering for early morning when winds are typically calmer. Low-trajectory nozzles reduce drift. In persistently windy areas, subsurface drip for turf (specialized tubing buried shallowly) may be a viable alternative.
- Sensing technology: Rain sensors prevent unnecessary cycles during precipitation. Soil moisture sensors provide real-time feedback, halting irrigation when soil moisture is sufficient—adding responsiveness beyond calendar-based scheduling.
Zone Design: The Core of Hydrozoning
Zones are independent circuits controlled by valves. Each zone should contain plants with similar water needs, soil conditions, sun exposure, and slope.
– Zone development process:
1. Overlay your plant water-needs reference on your garden sketch.
2. Group “Higher Need” plants in one area → Zone 1.
3. Group “Moderate Need” plants in another → Zone 2.
4. Avoid mixing categories. If a low-water plant sits among moderate-need plants, consider relocating it or creating a micro-zone (single emitter on a separate valve circuit).
5. Account for slope: A moderately sloped vegetable bed may need its own zone versus a flat herb garden, even if both fall under “Higher Need.”
– Flow capacity consideration:
The combined output of all emitters or sprinklers in a zone should not exceed your measured water source flow rate (GPM).
Example: Spigot delivers 8 GPM. Zone has 40 drip emitters at 1 GPH each.
– Total zone demand: 40 × 1 GPH = 40 GPH ÷ 60 = 0.67 GPM (within capacity).
Example: Zone has 6 rotor heads, each using ~3 GPM.
– Total demand: 6 × 3 GPM = 18 GPM (exceeds 8 GPM capacity).
Solution: Split into two zones (3 heads per zone). Calculating demand before purchasing components prevents performance issues.
– Valve considerations:
– Anti-siphon valves: Often required by local code for systems connected to potable water. Installed above the highest point of the irrigation lines to prevent backflow.
– In-line valves: Used in valve boxes below grade. Require a separate backflow prevention device per local regulations.
– Smart valves: Integrate with weather-responsive controllers; enable remote shutoff for leak management.
Controller Selection: From Timer to Responsive Intelligence
The controller directs system operation. Selection impacts long-term efficiency.
– Controller types:
– Manual timer (hose-end): Simple, affordable. Suitable for single-zone container or patio setups.
– Basic digital timer: Programmable start times, durations, days. Requires manual seasonal adjustments.
– Weather-responsive “smart” controller: Connects to local weather data or on-site sensors. Adjusts schedules based on temperature, humidity, rainfall, and evapotranspiration (ET) estimates. EPA WaterSense certified models are designed for efficiency; field reports indicate potential water savings compared to fixed schedules. Recommended for multi-zone systems where conditions vary.
– Soil moisture sensor integration: Can be added to many controllers. Measures actual soil conditions; skips cycles when moisture is adequate. Particularly valuable for clay soils or high-value plantings.
– Programming mindset: Avoid defaulting to daily cycles. Consider plant biology:
– Turf: Deep, infrequent watering (e.g., 2–3 times weekly) encourages deeper roots.
– Vegetables: Frequency increases during peak heat; duration should moisten the root zone (check soil 2″ down).
– Established natives: Infrequent deep watering aligns with natural adaptation.
Guiding principle: Program for the area within the zone with the greatest need. If one plant consistently shows stress, investigate causes (root competition, soil variation) rather than overwatering the entire zone.
Component Selection: Prioritizing Long-Term Performance
Thoughtful component choices support durability and function.
– Tubing:
– Polyethylene (PE) tubing: UV-resistant formulations offer longer service life. Use ½” for mainlines (runs up to ~200 ft), ¼” for feeder lines.
– Avoid vinyl tubing: More prone to cracking, kinking, and UV degradation over time.
– Filtration: Essential for drip systems.
– Screen filter: Suitable for relatively clean municipal water. Clean periodically.
– Disk filter: Better suited for water with higher sediment loads (e.g., some well water).
– Pressure regulation: Drip systems typically operate best at 20–30 PSI. A pressure regulator installed after the filter helps protect components.
– Backflow prevention: Required by plumbing code where irrigation connects to household water supply. Prevents potential contamination of the potable system. Types include Atmospheric Vacuum Breakers (AVBs), Pressure Vacuum Breakers (PVBs), and Reduced Pressure Zone (RPZ) assemblies. Always verify local requirements with your water authority. Safety and compliance are non-negotiable.
Layer 3: The Execution – Thoughtful Installation and Adaptive Maintenance
Design informs action; mindful installation and ongoing care ensure lasting performance.
Pre-Installation Verification: The Dry Layout
Before securing any component:
1. Lay tubing and components on the soil surface per your blueprint.
2. Connect to the water source without activating flow.
3. Walk the entire layout. Verify:
– Emitters target root zones (not stems or pathways)
– Tubing follows contour lines on slopes
– No sharp bends or kinks
– Zones align with your hydrozoning map
4. Briefly activate water (5–10 seconds). Check for leaks, misaligned sprays, or weak flow. Adjust now.
Why this matters: Correcting placement on the surface takes moments. Fixing buried errors requires significant rework. This step prevents most common installation issues.
Step-by-Step Drip System Installation (Vegetable Bed Example)
Tools: Tubing cutter, hole punch, goof plugs, landscape staples, measuring tape, gloves.
1. Prepare the area: Clear weeds. Amend soil if needed per your soil assessment.
2. Position mainline: Run ½” tubing along the bed perimeter. Leave service slack at the connection end. Anchor with staples every few feet. On slopes: Run tubing horizontally across the slope (contour), not vertically.
3. Assemble inlet components: At the spigot: Backflow preventer → Filter → Pressure regulator → Timer (if used) → Mainline tubing. Hand-tighten compression fittings; avoid overtightening.
4. Create emitter ports: Use a hole punch to make clean ports in the mainline where plants will be placed. Angle slightly upward to minimize leakage risk.
5. Attach delivery lines: Insert ¼” feeder tubing into ports; attach emitters at plant bases. For rows, inline drip tubing (emitters pre-installed) can streamline setup.
6. Seal endpoints: Cap all open tubing ends. Uncapped lines lose pressure and spray unintentionally.
7. Initial flush: Temporarily remove end caps. Activate water briefly (20–30 seconds) to flush installation debris. Re-cap securely.
8. Functional check: Run the zone for several minutes. Confirm even flow from all emitters. Adjust placement if water pools or misses target areas.
9. Apply mulch: Cover tubing with 2–3″ of organic mulch (straw, wood chips). Benefits: Reduces evaporation significantly, suppresses weeds, moderates soil temperature. Note: Keep mulch slightly clear of plant stems to support airflow.
Step-by-Step Sprinkler System Installation (Small Turf Area Example)
Tools: Trenching tool or shovel, pipe cutter, PVC primer/glue (if using PVC), level, marking flags.
1. Mark layout: Use flags or spray paint to indicate head locations. Confirm head-to-head coverage visually.
2. Excavate trenches: Dig 8–12″ deep (below local frost line where applicable). Create a slight slope toward the valve box for drainage.
3. Install mainline: Use appropriate pipe (e.g., Schedule 40 PVC). Cut cleanly; deburr edges. Dry-fit joints before permanent assembly.
4. Position valves: Install in a valve box. Ensure anti-siphon valves are positioned above the highest sprinkler head per code requirements.
5. Mount heads: Use swing joints (flexible connectors) for heads—allows adjustment without stressing pipes. Set height so the top of the head is level with the finished grade. Critical: Use a level during installation. Uneven heads cause dry spots or pooling.
6. Flush lines: Before final head attachment, cap ends. Activate water briefly to flush debris.
7. Test coverage: Temporarily install heads. Run the zone. Adjust nozzles to achieve full coverage without spraying hardscapes, structures, or non-target areas.
8. Backfill carefully: Gently tamp soil around heads to prevent settling. Lightly water the backfill soil; add more soil if settling occurs.
9. Initial programming: Start with conservative run times (e.g., 10 minutes). After a cycle, check soil moisture depth (4–6″ is often ideal for turf). Adjust duration incrementally.
The Adaptive Maintenance Cycle: Seasonal Care Practices
A responsive system evolves with the seasons. “Set-and-forget” approaches often lead to inefficiency.
| Season | Key Practices | Purpose |
|---|---|---|
| Spring | – Flush entire system – Inspect all emitters/sprinklers – Clean/replace filters – Review and adjust controller schedule – Verify backflow device function (per local requirements) |
Clears winter debris. Prepares for increasing water demand. Ensures safety compliance. |
| Summer | – Weekly visual checks during operation – Clean filters as needed – Adjust run times based on temperature and plant response – Replenish mulch where thin |
Addresses peak stress. Catches small issues before they escalate. Adapts to changing conditions. |
| Fall | – Gradually reduce run times – Perform thorough filter cleaning – Inspect tubing for rodent activity – Prepare for winterization procedures |
Aligns with decreasing plant needs. Addresses seasonal debris. Prevents winter damage. |
| Winter | – Critical: Blow out system with air compressor (follow manufacturer PSI guidelines) – Drain valves, filters, backflow devices – Store timers, filters, and sensitive components indoors – Insulate exposed above-ground parts |
Prevents freeze damage. Water expansion during freezing can rupture components. Prevention is far simpler than repair. |
- Addressing drip clogs:
- Symptom: Reduced or no flow from an emitter.
- First check: Clean the system filter—most clogs originate here.
- Flush the line: Disconnect the end cap; run water briefly.
- Clean the emitter: Remove; soak in mild vinegar solution (dissolves mineral deposits); gently clear the orifice with a soft brush. Avoid metal probes—they can enlarge the opening.
- Persistent issue: Replace the emitter. They are inexpensive and designed for replacement.
- Leak response guide:
- Small tubing puncture: Cut out damaged section; insert a coupling connector.
- Loose fitting: Tighten the compression nut gently. If leaking continues, inspect/replace the O-ring.
- Valve issue: Shut off water supply; consult the manufacturer’s guide or a professional for repair/replacement.
- Sprinkler head leak: Unscrew head; inspect and replace the seal washer if worn.
- Brief Weekly Observation (5 minutes):
- Walk through operating zones.
- Note dry spots (may need added emitters or adjusted time) or soggy areas (reduce time, check for breaks).
- Ensure water targets plants, not sidewalks or structures.
- Listen for unusual sounds (hissing may indicate a hidden leak).
- Wipe filter housing; note excessive debris (signals water quality consideration).
This consistent attention maintains efficiency and plant health.
Beyond the Basics: Adapting to Garden Realities
Gardens present unique scenarios. Here’s how to thoughtfully apply the framework.
Container Gardens & Patios: Precision in Confined Spaces
Potted plants experience faster moisture fluctuations due to limited soil volume and exposure.
– Approach: Micro-drip kits offer targeted delivery.
– Run ¼” tubing along railing edges or shelf lines.
– Use adjustable emitters matched to pot size and plant needs:
– Small pots (6″): One low-flow emitter
– Medium pots (10″): One standard emitter
– Large pots (18″+): Two emitters positioned opposite each other
– Pair with a battery-operated timer for short, frequent cycles during hot periods.
– Supportive practice: Place pots on saucers with pebbles (not standing water). Elevates the pot for airflow, catches minor runoff for reabsorption, and reduces rot risk.
– Note: Soaker hoses are generally less effective in containers due to uneven output in small volumes.
Slopes & Erosion-Prone Areas: Guiding Water Thoughtfully
On inclines, work with water movement rather than against it.
– Contour trenching: Dig shallow trenches (2″ deep) across the slope (level). Place drip line within the trench. Water infiltrates before moving downhill. Cover with mulch.
– Emitter strategy: Pressure-compensating (PC) emitters help maintain uniform output. Consider slightly closer spacing on the downhill side of plants.
– Check valves: Install at the start of downhill runs to prevent post-shutoff drainage that can erode soil.
– Biological support: Integrate deep-rooted groundcovers (creeping thyme, sedum) between primary plants. Roots stabilize soil; foliage softens rainfall impact.
– Temporary stabilization: For active erosion, place burlap-wrapped soil rolls horizontally across the slope. Install drip line on top. Plants grow through the burlap, establishing long-term stabilization.
Vegetable Gardens: Supporting Yield and Flavor
Consistent moisture prevents common issues like blossom end rot (tomatoes) or root cracking (carrots).
– Hydrozoning within beds: Group thirsty crops (cucumbers, celery) separately from drought-tolerant varieties (beans, chard). Use dedicated feeder lines if space allows.
– Targeting root zones:
– Shallow-rooted crops (lettuce, radishes): Surface-level emitters.
– Medium-rooted crops (peppers, beans): Emitters positioned slightly below surface.
– Deep-rooted crops (tomatoes, squash): Place initial emitters near the planting hole; add emitters outward as the plant grows to encourage root expansion.
– Mulch partnership: Combine drip with organic mulch. Reduces evaporation, keeps fruit clean, suppresses weeds. Refresh mid-season as needed.
– Seasonal tuning: Seedlings benefit from frequent light moisture. Mature plants thrive with deeper, less frequent cycles to drive roots downward. Review controller settings monthly.
Xeriscaping & Native Plant Gardens: Honoring Natural Adaptation
Xeriscaping means wise water use, not zero water. Many native plants are vulnerable to overwatering.
– Establishment phase (first year): Critical period. Use temporary drip lines to encourage deep root development. Water deeply but infrequently (e.g., once weekly).
– Mature phase (year 2+): Gradually reduce supplemental watering. Many established natives thrive on rainfall alone. Supplement only during prolonged drought (e.g., several weeks without rain), applying water slowly at the base. Avoid frequent light sprinkling.
– Soil amendment note: Desert-adapted natives (agave, yucca) often prefer lean, fast-draining soil. Avoid rich compost; incorporate coarse sand or gravel if drainage is poor.
– Observation over schedule: Learn plant signals. Slight afternoon leaf curl is normal for many natives in heat; persistent wilting at dawn indicates need. Trust plant cues more than calendar dates.
Technology Integration: Adding Responsiveness
Move beyond fixed schedules with thoughtful technology.
– Weather-responsive controllers (EPA WaterSense certified):
– Function: Connect to local weather data. Calculate daily evapotranspiration (ET) estimates. Adjust run times automatically.
– Practical impact: Skips cycles before rain; reduces duration on cool, humid days; extends during heatwaves. Documented case studies and user reports indicate potential water savings compared to standard timers.
– Examples: Rachio 3, Rain Machine, Orbit B-hyve (verify current models).
– Soil moisture sensors:
– Placement: Bury the probe within the root zone of a representative plant in the zone.
– Function: Measures actual soil moisture. The controller skips irrigation if moisture is above the set threshold.
– Consideration: Particularly valuable for clay soils (prone to overwatering) or high-value plantings.
– Flow monitoring sensors:
– Installation: Positioned between the backflow device and valves.
– Function: Detects abnormal flow (indicating a broken line or stuck valve) and can send alerts. Essential for remote properties or peace of mind during travel.
– Accessibility note: Modern interfaces often include guided setup. Many water utilities offer rebates for WaterSense certified devices—check local programs.
Navigating Common Constraints: Practical, Adaptive Strategies
Real-world limitations require flexible solutions. Address them with clarity.
Limited Budget: Phased Implementation Approach
Efficiency builds incrementally. Start where impact is highest.
– Phase 1 (Initial investment <$50): Convert one high-value area (vegetable bed, prized rose bed) to drip. Purchase: 50 ft ½” tubing, 10 pressure-compensating emitters, filter, pressure regulator, hose-end timer. Install in an afternoon. Impact: Immediate focus on critical plants; validates the approach.
– Phase 2 (Next season): Expand to additional beds. Reuse the timer if multi-outlet capable.
– Phase 3 (Future): Upgrade to a weather-responsive controller; add sensors.
– Budget-conscious substitutions:
– Fittings: High-quality plastic compression fittings offer reliable service for many seasons.
– Tubing placement: Lay tubing on the surface; anchor with staples; cover with mulch (protects from UV; lasts several years).
– Backflow consideration: If your spigot has a built-in vacuum breaker, a hose-end timer with backflow protection may suffice (verify local code).
– Resource check: Many municipal water departments offer rebates ($50–$200) for WaterSense controllers or drip conversion kits. Some community tool libraries lend irrigation tools.
Low Water Pressure: Designing Within Constraints
Low pressure (<25 PSI dynamic) requires tailored design, not abandonment.
– Drip systems excel: Operate effectively at lower pressures. Avoid spray-type sprinklers.
– Zone segmentation: Split a large zone into two smaller zones. Each draws less flow, maintaining adequate pressure.
– Emitter selection: Choose emitters rated for lower pressure. Slightly closer spacing may compensate for lower individual output.
– Gravity assist (small scale): Elevating a rain barrel (e.g., on a sturdy stand) uses gravity to provide gentle pressure. Note: Requires refilling; best for very small zones.
– Professional consultation: If dynamic pressure is consistently very low (<15 PSI), a qualified plumber can assess household plumbing constraints. Forcing an undersized system risks poor performance.
Limited DIY Confidence: Knowing When to Seek Support
Honest self-assessment prevents frustration.
– Confident DIY projects:
– Surface drip systems for beds or containers
– Soaker hose setups in straight rows
– Installing hose-end timers and filters
– Consider professional installation for:
– In-ground sprinkler systems (trenching, precise grading, PVC work)
– Situations requiring licensed backflow device installation/testing (common for permanent systems)
– Complex pressure or water source diagnostics
– Finding qualified help:
– Look for “Certified Irrigation Technician” (CIT) credentials through the Irrigation Association.
– Ask: “Do you conduct a site assessment before providing a quote?” (Essential step).
– Request a written hydrozoning plan and component specifications.
– Verify license, insurance, and references.
– Hybrid strategy: Use this guide to develop your design and specifications; hire a professional for installation execution. This maintains your vision while leveraging technical skill, often at lower cost than full-service design/build.
Safety and Compliance: Essential Considerations
These steps protect health, legality, and system integrity.
– Backflow prevention: Irrigation systems connected to potable water require a certified backflow prevention device to prevent potential contamination during pressure fluctuations.
– Requirement: Type and installation specifics are mandated by local water authorities. Common types include AVBs, PVBs, or RPZ assemblies.
– Critical detail: AVBs must be installed vertically and at least 6 inches above the highest downstream point (e.g., sprinkler head). PVBs/RPZs often require professional installation and annual testing.
– Action: Contact your local water provider before installation to confirm required device type and regulations. Non-compliance risks fines or water service interruption.
– Underground utility safety: Before digging any trench:
1. Call 811 (USA) or your national “call before you dig” service.
2. Wait the required time (typically 2–3 business days) for utility locates.
3. Hand-dig carefully within 18 inches of marked lines.
Striking underground utilities causes severe hazards. This free service is legally required and non-negotiable.
– Electrical safety: For AC-powered controllers:
– Use a GFCI-protected outlet.
– House all electrical components in a weatherproof enclosure.
– Use waterproof connectors for any underground wire splices.
Your Questions, Answered
Q: How much water can I expect to save with a drip system compared to hand watering?
A: Research from agricultural extensions suggests properly designed drip systems can significantly reduce outdoor water use compared to manual hose watering. Savings stem from targeted delivery (minimizing runoff and evaporation) and precise application. Actual savings vary based on prior habits, soil type, climate, and system design. Tracking your water bill over one full growing season provides the most accurate personal benchmark.
Q: Can I integrate rainwater or greywater into my irrigation system?
A: Yes, with important considerations. For rainwater: Connect drip systems to rain barrel outlets using a fine-mesh filter (150-micron) to protect emitters. Gravity-fed systems work best for low-pressure drip. For greywater (from showers, laundry): Subsurface drip application is generally required; never spray on edible crops above ground. Greywater systems involve specific filtration, distribution requirements, and strict adherence to local health and plumbing codes—consult a certified greywater installer. Kitchen sink water is typically unsuitable due to food particles and grease.
Q: My drip emitters keep clogging. What’s the most effective solution?
A: Clogging usually originates from sediment, minerals (in hard water), or biological growth. A layered approach works best: 1) Install the appropriate filter at the water source (disk filter for sediment-heavy water; screen filter for municipal). Clean it regularly. 2) Flush the entire system monthly by removing end caps and running water for 60 seconds. 3) For mineral buildup, a phosphate injector may help (consult filter manufacturer). 4) Store the system dry during off-seasons to inhibit algae. If issues persist, test your water source; severe cases may warrant whole-house filtration consultation.
Q: Is deep, infrequent watering better than light, daily watering?
A: For most established plants, deep and infrequent watering encourages roots to grow deeper, enhancing drought resilience. Shallow, frequent watering keeps roots near the surface, where they dry out quickly. Exceptions include seedlings, newly transplanted plants, and shallow-rooted crops (like lettuce), which need consistent surface moisture until established. Test your soil: 12 hours after watering, dig down. Moisture should reach just below the active root zone. Adjust duration to achieve this depth.
Q: How do I properly winterize my system in a freezing climate?
A: Proper winterization prevents costly damage from frozen water expansion. Complete these steps before the first hard freeze: 1) Shut off the water supply to the irrigation system at the main valve. 2) Open all manual drain valves on valves and the backflow device. 3) Use an air compressor (follow manufacturer guidelines, typically ≤50 PSI) to blow out each zone individually—start with the zone farthest from the compressor. Stop when air flows freely from all heads. Never use a shop vacuum. 4) Remove timers, filters, and backflow devices; store indoors. 5) Insulate exposed above-ground components. For drip systems: Disconnect tubing at the spigot, drain thoroughly, and store coiled indoors if feasible. If left in place, ensure all water drains by elevating tubing ends.
Q: Can I install irrigation in an existing mature garden without harming plants?
A: Yes, with careful technique. For drip systems: Lay tubing on the soil surface along plant bases; secure with U-stakes; cover with mulch. No digging required. For in-ground sprinklers near trees: Use a water jetter (soil needle) to create narrow trenches, minimizing root disturbance. Avoid trenching within the tree’s drip line (the area under the outermost branches) where fine feeder roots concentrate. If roots are exposed during necessary digging, cover them immediately with damp burlap and replace soil gently. Prioritize plant health over perfect line placement; work slowly and observe plant responses.
Q: What’s the most common irrigation mistake homeowners make?
A: Overwatering driven by fear of underwatering. Plants exhibit stress from both conditions, but symptoms of overwatering (yellowing leaves, wilting in wet soil, fungal issues) are often misinterpreted as “needing more water,” creating a harmful cycle. The solution: Trust soil moisture, not the calendar. Insert your finger 1–2 inches deep. If soil feels damp, wait. A soil moisture sensor provides objective data. Remember: Many established perennials, natives, and shrubs thrive with less frequent watering. When uncertain, skipping one cycle is generally safer than adding an unnecessary one.
Q: How often should irrigation components be replaced?
A: Proactive maintenance extends system life. General guidance:
– Emitters/tubing: Inspect annually. Replace if brittle, cracked, or leaking (quality polyethylene tubing often lasts 5–10+ years).
– Filters: Clean during the growing season; replace screens/disks every 2–3 years or if damaged.
– Pressure regulators: Test flow annually; replace if output becomes inconsistent (typically 5–7 years).
– Valves: Last 10–15 years. Replace if leaking internally (zone activates when off) or externally.
– Controllers: Consider upgrading every 8–10 years to leverage technological advances.
Maintaining a simple log of installation and service dates simplifies scheduling.
Q: Are weather-responsive (“smart”) controllers worth the investment?
A: For multi-zone systems in variable climates, they often provide strong value. By adjusting automatically for local weather conditions, they eliminate common errors like watering during rain or failing to increase cycles during heatwaves. EPA WaterSense certified models undergo testing for efficiency. Field studies and user reports indicate meaningful water savings compared to standard timers. If you travel frequently, experience variable weather, or desire hands-off optimization, the return on investment in water savings, plant health, and convenience is frequently compelling. Starting with one zone for evaluation is a low-risk approach.
Q: How can I tell if my irrigation system is working efficiently?
A: Conduct a simple efficiency check:
1. Uniformity test (sprinklers): Place identical containers (e.g., tuna cans) throughout the zone. Run a full cycle. Measure water depth in each. Variation should be minimal (<15%). Adjust head spacing or nozzles if uneven.
2. Soil moisture check (drip): After a cycle, dig small holes near emitters. Moisture depth should be consistent and reach the target root zone. Dry spots indicate needed emitters; pooling suggests over-application or clogs.
3. Water use review: Compare current month’s outdoor water use to the same month last year (accounting for significant rainfall differences). Unexplained increases warrant investigation.
4. Plant observation: Uniform growth, healthy color, and absence of stress symptoms at peak heat indicate effective watering. Yellowing, sparse growth, or disease may signal recalibration needs.
True efficiency is reflected in thriving plants and conscientious resource use.
Conclusion and Your Path Forward
You now hold a framework rooted in observation, adaptation, and care—not just for installing components, but for cultivating a deeper dialogue with your garden’s unique character. We’ve moved from reactive habits to proactive stewardship: listening to soil cues, honoring plant needs, designing with ecological awareness, and maintaining with seasonal mindfulness. The three layers—Assessment, Design, Adaptive Maintenance—form a resilient cycle. When you hydrozone with intention, select components thoughtfully, and tune schedules with observation, you cultivate more than plant health. You build garden resilience. You reclaim time once spent on repetitive tasks. You nurture soil life that sustains your plants. You contribute positively to local water resources, one mindful drop at a time.
Recap: Your Three Anchors of Efficiency
- Observe before you act: Your garden’s soil, sun patterns, slope, and plants provide the essential blueprint. Thorough assessment prevents most future challenges.
- Design for harmony: Match system type to site conditions. Hydrozone diligently. Verify flow capacity. Prioritize safety and compliance.
- Maintain with awareness: Integrate brief weekly checks and seasonal tune-ups. Let plant response and soil conditions guide adjustments. Technology, when chosen thoughtfully, supports this rhythm.
The 24-Hour Rule: One Small Step Forward
Within the next 24 hours, complete this single action:
👉 Take a notebook and sketch a simple map of your garden. Circle one area where watering feels challenging (a consistently dry bed, a spot prone to puddling, a section contributing to high water use). Jot down brief notes: general soil feel (sandy/clay), sun exposure pattern, and dominant plant types.
This isn’t about perfection. It’s about beginning. That circled area is your starting point. Next weekend, you can assess it more deeply. The following week, explore a solution. Momentum grows from one intentional mark on paper.
The Bigger Picture: Your Garden’s Ripple Effect
Every mindful choice matters. Residential landscapes represent a significant portion of community water use in many regions. When you optimize your approach:
– You reduce demand on municipal systems and energy used for water treatment and distribution.
– You help protect local streams, rivers, and aquifers from over-extraction.
– You model thoughtful stewardship for neighbors, family, and community.
– You create habitat where soil organisms, pollinators, and beneficial insects thrive.
This is more than gardening. It’s quiet, consistent care. It’s legacy. The most meaningful measure of an efficient irrigation system isn’t solely gallons saved—it’s the vibrant, resilient life it sustains, season after season, through wisdom, attention, and respect.
Explore Our Complete System:
Water-Wise Soil Building: Amend for Maximum Moisture Retention | Smart Controller Setup Walkthrough: From Unboxing to Perfect Schedule | Seasonal Irrigation Tune-Up Calendar (Printable PDF) | DIY Rainwater Harvesting for Gardeners | Troubleshooting Guide: 20 Common Irrigation Problems Solved