Unlock spatial harmony, define purpose, and elevate flow with precision-tested rug strategies that transform chaotic spaces into intentional sanctuaries.
Selecting and placing a rug is far more than a decorative afterthought—it’s the architectural keystone that silently communicates a room’s purpose, scale, and emotional rhythm. When executed with intention, a rug doesn’t just sit in a space; it creates the space. This guide dismantles fragmented advice, replacing guesswork with a unified framework rooted in spatial psychology, proportional principles, and real-world application. Whether you’re furnishing a compact studio, a sprawling open-plan loft, or a historically detailed Victorian parlor, you’ll gain actionable protocols to anchor every square foot with confidence.
Introduction: Why “Anchoring” Is the Missing Link in Room Design
Walk into any thoughtfully composed room, and you’ll feel an immediate sense of order—a quiet assurance that everything belongs exactly where it is. This isn’t accidental. It’s the result of deliberate spatial anchoring: the strategic use of foundational elements to define zones, guide movement, and establish visual hierarchy. Among these elements, the area rug holds unparalleled power. Unlike walls or furniture, a rug operates on the horizontal plane—the very plane upon which we move, gather, and live. It is the visual and functional “floor” of the room’s experience.
Historical design traditions worldwide recognize this principle. Persian farsh carpets defined seating areas in nomadic tents and royal courts alike. Japanese tatami mats physically and philosophically structured living spaces around human scale and ritual. European grand salons used vast Savonnerie carpets to delineate conversation circles beneath soaring ceilings. These traditions weren’t about style—they were about spatial grammar. Contemporary environmental psychology supports this intuition: clearly defined boundaries reduce cognitive load. When a room’s purpose is visually clear, occupants often report feeling calmer, more oriented, and more connected to the environment. A poorly placed rug can create subtle friction—a room that feels “unsettled” without obvious reason. A thoughtfully anchored rug minimizes that friction, transforming ambiguity into intention.
This guide synthesizes established spatial principles, material considerations, behavioral patterns, and documented design approaches into a single, actionable system. We move beyond subjective phrases like “it feels right” to provide measurable criteria, room-specific guidelines, and adaptable protocols. You’ll learn not just what to do, but why it works—and how to adjust when constraints arise. This is rug selection reimagined as spatial strategy.
The Triad Anchoring Framework: Spatial, Functional, Aesthetic
Forget fragmented checklists. True anchoring requires balancing three interdependent layers. Neglect one, and cohesion suffers. Master all three, and your room achieves grounded harmony. This framework draws from documented spatial practices to resolve persistent design challenges.
Layer 1: Spatial Anchoring — Defining the Room’s Architecture
Spatial anchoring answers the foundational question: Where does this functional zone begin and end? This layer operates on geometry, proportion, and sightlines. It establishes visual stability.
The 80/20 Floor Guideline: For any primary seating or activity zone (living room conversation area, dining table setting, bedroom sleeping area), the rug should cover approximately 80% of the floor space within the defined furniture perimeter. Crucially, this does not mean 80% of the entire room. Measure the rectangle formed by the outer edges of your key furniture pieces. The rug should extend 12–24 inches beyond this rectangle on all sides. Why? This creates a “breathing margin” that visually contains the zone without making it feel cramped or adrift. In a living room with a sofa and chairs forming a 10’x12′ seating footprint, the ideal rug spans approximately 12’x14′.
Why this matters: Without this margin, furniture may appear to “float” precariously near the rug’s edge. Too large a margin (e.g., rug extending to walls) can overwhelm the zone, making the room feel smaller. The 12–24″ buffer aligns with spatial perception principles—it signals containment without confinement.
The Threshold Principle: Avoid placing a rug so it stops abruptly at a doorway or high-traffic transition point. If a door swings inward over the rug area, ensure the rug extends at least 18 inches beyond the door’s closed position. Why? Safety first—this minimizes tripping hazards. Psychologically, it prevents the unsettling sensation of “stepping off a cliff” when entering the room. In open-plan spaces, use rugs to create intentional thresholds between zones (e.g., living area to dining area), with a consistent 6–12 inch gap between rug edges to signal transition without visual chaos.
Room Shape Adaptation Protocol:
– Rectangular Rooms: Align rug edges parallel to the longest walls. Avoid centering a square rug in a long rectangle—it can fracture the space visually.
– Square Rooms: A square or round rug centered under key furniture often creates balanced radial symmetry.
– Odd-Angled/Nooks: Use a custom-cut rug or layer a smaller rug within the primary zone to honor the irregular shape without fighting the architecture.
– Hallways: Runners should leave 3–5 inches of exposed floor on each long side. Too narrow feels like a path; too wide eliminates necessary wall clearance.
The Fundamental Principle: A rug does not merely decorate the floor—it defines the room’s functional footprint. Its edges act as the invisible boundaries of your chosen zone.
Layer 2: Functional Anchoring — Serving Human Behavior
Functional anchoring addresses how people actually use the space. A rug that looks perfect in imagery may falter in daily life if it ignores behavior. This layer prioritizes durability, maintenance, safety, and sensory experience.
Traffic Flow Mapping: Before selecting material or size, trace the room’s primary pathways with painter’s tape on the floor. Where do people walk most? From sofa to kitchen? Around the dining table? Under the desk chair? High-traffic paths benefit from flatweaves (sisal, seagrass, low-pile wool), tightly woven synthetics, or vintage kilims with inherent durability. Deep-pile shags or delicate silks are generally less suitable here—they may mat down, trap debris, or create resistance. In a family room with a path from the TV area to the hallway, position the rug so the path crosses the shorter dimension (minimizing wear length) and select a 0.25″–0.5″ pile height.
Activity-Specific Considerations:
– Dining Rooms: The rug should extend at least 24 inches beyond the back legs of all chairs when pulled out. Calculate: Table width + (2 × chair depth when pulled out) + (2 × 24″). For a standard 42″ round table with chairs pulling out 20″, minimum rug diameter ≈ 130″ (10’10”). This helps prevent chairs from catching rug edges mid-pull—a practical detail for safety and ease of movement.
– Bedrooms: For bedside comfort, ensure the rug extends 18–24 inches beyond each side of the bed and 36+ inches beyond the footboard. Waking up to cold flooring is a common friction point; this margin ensures feet land on a welcoming surface.
– Home Offices: Chair casters typically require low-pile (under 0.5″) or flatweave rugs. High-pile rugs may strain chair mechanisms. A durable office mat over the rug under the chair zone can offer added protection if needed.
– Nurseries/Playrooms: Prioritize washable materials (cotton, indoor/outdoor polypropylene) and non-slip pads. Avoid loose fringe where small hands might snag.
Sensory & Safety Considerations:
– Slip Resistance: Pair rugs with appropriate pads. Felt pads suit hardwood (helping prevent scratches); rubber-grid pads suit tile (enhancing grip). Unsecured rugs increase slip risks—this step is widely recommended by safety resources.
– Pile Height Logic: Low pile (<0.5″) suits high traffic, under furniture, or accessibility needs. Medium pile (0.5″–1″) offers a balance of comfort and cleanability for living rooms or bedrooms. High pile (>1″) is generally best reserved for low-traffic zones like a master bedroom’s center.
– Allergy Consideration: Tight weaves (hooked rugs, flatweaves) may trap less dander than deep piles. Wool is naturally resistant to dust mites; in poorly ventilated spaces, some may prefer materials with lower off-gassing potential.
Layer 3: Aesthetic Anchoring — Weaving Visual Harmony
Aesthetic anchoring harmonizes the rug with the room’s color story, scale, pattern language, and emotional intent. This layer is deeply personal but should support the spatial and functional layers—not override them.
Color Strategy Guide:
| Room Goal | Rug Color Approach | Why It Works |
|——————–|—————————————————–|—————————————————————————–|
| Calm Sanctuary | 10–20% darker than dominant wall color; muted tones | Creates grounded stability; avoids visual “float” |
| Small Room Illusion| Lighter than walls; monochromatic scheme | Reflects light; can expand perceived space |
| Bold Statement | Pull ONE accent color from art/furniture; 60% neutral base | Prevents visual chaos; ties disparate elements together |
| High-Contrast Drama| Deep charcoal/navy on light floors; crisp white on dark | Defines zone sharply; modern architectural feel |
| Eclectic Mix | Rug as “pattern anchor”—largest scale pattern in room | Gives the eye a resting point; prevents competing patterns from clashing |
Pattern Scaling Guidance:
– Large Rooms (>250 sq ft): Bold patterns (large medallions, oversized geometrics). Small patterns may get lost.
– Medium Rooms (150–250 sq ft): Medium-scale patterns (traditional florals, ikats, trellis).
– Small Rooms (<150 sq ft): Subtle textures (heathered wool, tone-on-tone herringbone), fine stripes, or solid colors. Busy patterns may amplify a sense of confinement.
– Pattern Mixing Tip: If the room has patterned wallpaper or bold art, choose a rug with a different scale and type of pattern (e.g., large-scale floral rug with small-scale striped pillows). Matching pattern scales exactly can create visual vibration for some viewers.
Material as Mood Setter:
– Wool: Warm, resilient, timeless. Absorbs sound. Ideal for living rooms, bedrooms. Feels substantial underfoot.
– Jute/Sisal: Earthy, textural, casual. Adds organic warmth but can feel scratchy. Best in sunrooms, hallways, rustic spaces. Always use a pad—natural fibers may stain more readily.
– Silk/Viscose: Lustrous, luxurious, delicate. Creates light-play and elegance. Generally suited to low-traffic formal areas. Note: Viscose may mat permanently when wet; consider carefully in homes with pets or children.
– Polypropylene (Indoor/Outdoor): Stain-resistant, fade-resistant, affordable. Modern weaves mimic wool beautifully. Well-suited for kitchens, mudrooms, covered patios, playrooms.
– Cotton: Soft, washable, casual. Ideal for nurseries, beach houses, layered looks. Less durable long-term in high-wear zones.
The Harmony Check: Stand at the room’s entrance. Does the rug:
1. Feel integrated with the furniture (not a random addition)?
2. Guide your eye toward the room’s focal point (fireplace, bed, art)?
3. Create a sense of “welcome” underfoot when stepping into the zone?
If any answer gives pause, consider adjusting scale, color, or placement before finalizing.
Room-by-Room Anchoring Deep Dive: Precision Guidelines for Every Space
Generic advice often fails in real rooms. Here, we provide adaptable protocols for eight distinct scenarios, including edge cases frequently overlooked.
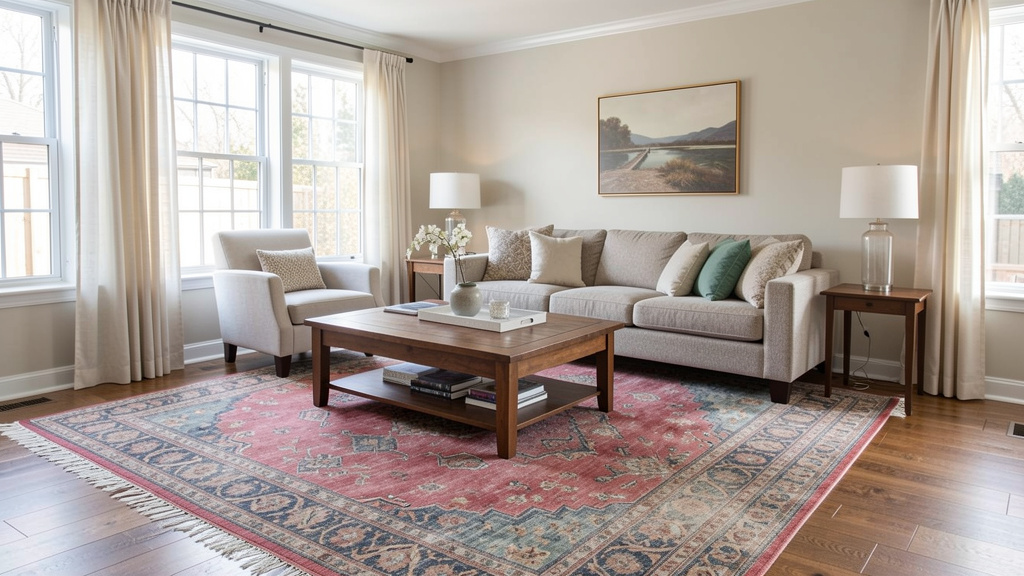
Living Room: The Conversation Catalyst
The living room rug’s primary role: unite seating into a cohesive conversation circle. Misalignment here can fragment interaction.
The Furniture Footprint Guideline:
1. Arrange seating first—sofa, chairs, ottomans—in your intended layout.
2. Measure the rectangle formed by the front legs of all primary seating pieces.
3. Add 24–36 inches to both length and width. This indicates your minimum rug size.
– Example: Sofa (84″W) + two chairs arranged in a U-shape create a 10’x12′ footprint. Minimum rug: ~12’x14′.
4. Critical nuance: All front legs of primary seating should rest on the rug. Rear legs may sit off-rug in very large rooms (>20′ long), but front legs on rug supports visual stability. If space constraints prevent this, consider adjusting furniture scale or selecting a rug that fits under the entire seating group—even if it means floating 6″ from walls.
Open-Plan Living/Dining Challenge:
– Problem: One massive rug spanning both zones can feel warehouse-like. Two separate rugs may create visual chaos.
– Solution: Use two rugs with intentional separation.
– Living area rug: Sized per footprint guideline above.
– Dining area rug: Sized per dining protocol (24″ beyond pulled-out chairs).
– Gap: Maintain a consistent 12–18 inch gap of exposed floor between rug edges. This gap acts as a visual “comma,” signaling two distinct zones.
– Harmony Tip: Choose rugs sharing core colors (e.g., both feature charcoal and cream) but differing in pattern or scale to reinforce unity without monotony.
Small Apartment Living Room Adaptation:
When square footage is tight (<12’x12″):
– Float furniture slightly away from walls (creates depth illusion).
– Choose a rug covering 70–80% of the entire room floor, not just the seating footprint. This makes the space feel intentionally designed.
– Opt for light colors with subtle texture (heathered gray, oat) to avoid visual weight.
– Avoid dark borders—they may shrink the space perceptually for some.
Dining Room: The Etiquette & Safety Anchor
A dining rug functions as a practical tool first. Its placement impacts movement, safety, and comfort during use.
The Pull-Out Guideline (Strongly Recommended):
Rug Diameter/Width ≈ Table Width + (2 × Chair Depth When Pulled Out) + (2 × 24″)
– Standard chair pull-out depth: 18–24 inches. Using 24″ provides a safety margin.
– Round Table Example: 48″ table + (2 × 20″) + (2 × 24″) = 136″ (11’4″) minimum diameter.
– Rectangular Table Example: 42″W x 72″L table + (2 × 22″) + (2 × 24″) = 134″ width minimum.
Why 24 inches? This helps ensure chairs remain fully on the rug even when guests lean back or stand. Less than 24″ may risk chair legs catching the rug edge—a potential trip hazard and source of friction during movement. In tight spaces where full calculation isn’t feasible:
– Adaptation: Prioritize the sides of the table. Ensure rug extends 24″ beyond table sides; accept slightly less (18″) at head/tail if necessary.
– Alternative: A rectangular rug under a round table may provide better coverage for chair movement paths.
Material Considerations:
– Stain Resistance: Wool (with proper care), polypropylene, or treated cotton are often suitable. Silk, viscose, or light-colored jute may be less practical.
– Pile Height: ≤ 0.5″. Higher piles can impede chair movement and trap debris.
– Pad Requirement: A non-slip pad is widely recommended. Dining chairs exert lateral force when moved; an unsecured rug may bunch.
– Shape Logic: Round tables can use round rugs, but rectangular rugs often offer more usable edge space. Oval tables pair well with oval rugs—align the rug’s long axis with the table’s.
Bedroom: The Sanctuary Foundation
The bedroom rug’s purpose: create a sensory transition from sleep to wakefulness, framing the bed as a restful zone.
Placement Guidance by Bed Size:
| Bed Size | Suggested Rug Size (Centered Under Bed) | Margin Guidance |
|———-|——————————————|———————————————-|
| Twin | 5’x8′ | 18″ beyond sides; 24″ beyond footboard |
| Full | 6’x9′ | 18″ beyond sides; 30″ beyond footboard |
| Queen | 8’x10′ | 24″ beyond sides; 36″ beyond footboard |
| King | 9’x12′ | 24″ beyond sides; 42″ beyond footboard |
| Cal King | 9’x12′ or custom 10’x14′ | 24″ beyond sides; 48″ beyond footboard |
Why these margins? The side margin ensures feet land on rug when sitting on the bed edge. The extended footboard margin (36″+) creates a “landing zone” for morning movement and accommodates benches. In master suites with sitting areas, treat sleeping and sitting zones as separate anchors:
– Primary rug under bed (sized per table above).
– Secondary smaller rug (3’x5′ or 4’x6′) under armchair grouping.
– Maintain ~12″ gap between rugs.
Material & Sensory Guidance:
– Under Bed Only: Higher-pile wool or shag (1.5″+) offers luxurious barefoot comfort in this low-traffic zone.
– Full-Room Coverage: Medium-pile wool (0.75″) balances comfort with durability for walking paths.
– Allergy Note: Wool’s natural properties may help resist dust mites. For heightened sensitivity, tightly woven cotton or polypropylene with washable properties may be preferable.
– Avoid: Sisal/jute directly beside the bed—they may feel harsh underfoot upon waking and could snag on nightclothes.
Entryway & Foyer: The First Impression Anchor
This high-impact, high-traffic zone demands strategic material and placement choices. A poorly chosen entry rug may become a dirt trap or safety concern.
Sizing for Safety & Function:
– Standard Entry (3’x5′ space): Use a 2’x3′ or 2’x4′ rug. Leave 6–8 inches of floor visible on all sides. This prevents door swing interference and creates an intentional “mat zone.”
– Grand Foyer (8’x10’+): Layer two rugs:
1. Large durable base rug (8’x10′ flatweave) defining the entire foyer footprint.
2. Smaller decorative rug (3’x5′) centered where guests naturally pause (e.g., under a light fixture).
– Critical Rule: Rug should sit entirely within the entry footprint. Avoid letting it creep into hallways—that can create a visual and physical obstacle.
Material Guidance by Environment:
| Environment | Recommended Material | Rationale |
|——————-|——————————-|——————————————————————–|
| High (Mud, Snow) | Indoor/Outdoor Polypropylene | Stain-resistant, hoseable, fade-resistant. Modern weaves look refined |
| Medium (City Dust)| Low-pile Wool or Cotton | Traps dirt in fibers; easy to maintain; naturally resilient |
| Low (Dry Climate) | Sisal with Rubber Backing | Provides texture; backing helps prevent slippage on tile |
| Generally Avoid | Silk, Viscose, High-Pile Shag | May stain permanently, mat down, or become hazardous when wet |
Placement Psychology:
– Position rug so its leading edge aligns with the door’s closed position. Creates a “welcome mat” effect.
– In narrow entries (<4′ wide), run a runner lengthwise. Leave 3″ floor margin on each long side.
– A secondary small scraper mat inside the door (if space allows) can catch initial debris before it reaches the main rug.
Kitchen: The Practical Anchor (Yes, It’s Possible!)
Kitchens present challenges—but with precise protocols, rugs can add warmth, reduce fatigue, and define work zones.
Zone-Specific Placement:
– In Front of Sink/Dishwasher: 2’x3′ or 2’x4′ rug. Must sit entirely within the work triangle. Edges should not impede cabinet doors or appliance clearance.
– Island Seating Area: If barstools define a breakfast nook, use a runner (2.5’x6′) centered under stools. Ensure rug extends 12″ beyond stool edges when pulled out.
– Full-Kitchen Runner: Only suitable in galley kitchens >10′ long. Runner should leave 4–6″ floor margin on each side. Never block primary pathways.
Material Essentials:
– Stain & Moisture Resistance: Indoor/outdoor polypropylene is often the top choice. Spills bead up; rugs can be hosed down. Modern flatweaves mimic vintage textiles beautifully.
– Slip Resistance: Rubber-backed rugs or separate non-slip pads are strongly recommended. Wet floors + smooth backing increase slip risk.
– Pile Height: Flatweave only (0″ pile). Any texture may trap crumbs and complicate cleaning.
– Generally Avoid: Wool (absorbs oils), cotton (may shrink when wet), jute (degrades with moisture exposure).
Maintenance Protocol:
– Shake out daily.
– Spot-clean spills promptly with mild soap/water.
– Deep clean monthly: hose down, air dry completely before repositioning.
– Rotate quarterly to ensure even wear under high-use spots (e.g., sink zone).
Home Office: The Focus & Comfort Anchor
A home office rug should support prolonged sitting, chair mobility, and mental clarity—without introducing distraction.
Chair Mobility Protocol:
1. Measure the full range of your desk chair’s movement (roll back fully, swivel to sides).
2. The rug should cover this entire movement zone plus 12 inches on all sides.
3. Critical: Pile height should be ≤ 0.5″. Higher piles may strain chair casters.
4. Pro Tip: A clear PVC office mat over the rug in the chair zone can protect fibers and ensure smooth rolling. Remove when not in use to prevent potential discoloration.
Zoning for Multi-Function Offices:
– Desk Zone: Low-pile rug (wool flatweave, polypropylene) sized to cover chair movement zone.
– Reading Nook/Lounge Zone: Separate smaller rug (3’x5′) with medium pile for comfort.
– Gap: Maintain 10–12″ floor space between rugs to signal functional separation.
– Color Psychology: Blues and greens may promote calm focus for some; avoid high-contrast patterns that compete with screen work.
Acoustic Benefit: Rugs absorb ambient noise—valuable in open-plan homes or upstairs offices. Wool rugs may reduce footfall noise for rooms below. Pair with wall textiles or curtains for enhanced acoustic control.
Stair Runners: The Safety & Rhythm Anchor
Stair runners serve as safety aids, architectural details, and design elements. Precision in selection and installation is essential.
Measurement Guidance:
– Width: Standard stair treads are ~36″ wide. Ideal runner width: 27″–30″. This leaves 3–4.5″ of exposed tread on each side—a critical safety margin for foot placement and visual balance.
– Length: Measure each tread and riser individually. Stairs are rarely perfectly uniform. Add ~2″ per step for secure attachment. Total length = (Steps × tread depth) + (Risers × riser height) + (2″ × total steps).
– Pattern Repeat: For patterned runners, calculate pattern repeat to ensure motifs align vertically. Professional installation is often recommended for best results.
Material & Safety Essentials:
– Pile Height: ≤ 0.25″. Higher piles increase tripping risk on risers.
– Backing: Should have non-slip latex or rubber backing. Loose runners without secure attachment are unsafe.
– Installation: Staples should be hidden in the crevice between tread and riser. Edges should be tightly bound—no fraying.
– Top/Bottom Treatment:
– Top: Runner should start 1–2″ below the top nosing. Avoid covering the top landing edge.
– Bottom: End 1–2″ above the bottom riser for clean termination.
– Renter-Friendly Alternative: For historic homes where nails are prohibited, heavy-duty double-sided carpet tape rated for stairs may be used. Re-tape annually. Test removal method beforehand.
Open-Plan Mastery: Anchoring Multiple Zones Without Chaos
Open-plan living tests rug strategy. Success requires treating the space as interconnected zones, not one vast floor.
The Zone Mapping Method:
1. Define Zones: Use furniture arrangement to create distinct areas (living, dining, workspace). Leave 3–4 feet of clear floor between zones.
2. Rug Sizing: Size each rug per its zone’s specific protocol (living room footprint guideline, dining pull-out calculation, etc.).
3. Gap Consistency: Maintain a uniform 12–18 inch gap of exposed floor between all rug edges. This gap acts as visual punctuation—”this is Zone A, this is Zone B.”
4. Alignment: Align rug edges parallel to room architecture (walls, beams, kitchen island). Angled rugs in open plans may create visual tension for some.
5. Color Harmony: Choose rugs sharing 1–2 core colors (e.g., all feature charcoal gray and cream). Vary patterns/scales to differentiate zones while maintaining cohesion.
Common Challenges & Adaptations:
– Challenge: One giant rug spanning everything.
Adaptation: Replace with zone-specific rugs. Giant rugs can erase functional boundaries.
– Challenge: Rugs of wildly different colors/patterns.
Adaptation: Introduce a unifying element—a throw pillow matching the dining rug’s accent color; artwork incorporating all rug colors.
– Challenge: Uneven gaps between rugs.
Adaptation: Measure and mark gaps with painter’s tape before placing rugs. Consistency supports clarity.
Architectural Reinforcement:
– Use area rugs to echo architectural lines. If your kitchen island runs east-west, align living and dining rugs parallel to it.
– In lofts with exposed beams, align rug edges perpendicular to beams to create intentional contrast.
– For curved walls or bay windows, use round or custom-shaped rugs to honor the architecture rather than fight it.
Material Deep Dive: A Performance-Oriented Guide
Choosing rug material aligns with lifestyle needs. This guide moves beyond marketing to real-world performance across key dimensions.
| Material | Durability | Stain Resistance | Comfort | Maintenance | Well-Suited For | Consideration |
|---|---|---|---|---|---|---|
| Wool | High | Good (natural oils) | High | Moderate | Living rooms, bedrooms, hallways | Higher investment; deep stains may require professional care |
| Polypropylene (Indoor/Outdoor) | High | Excellent | Medium | Easy | Kitchens, mudrooms, patios, kids’ rooms | May feel less plush; static possible in dry climates |
| Jute/Sisal | Medium | Low | Low | Challenging | Dry climates, low-traffic hallways | Stains readily; rough texture; avoid moisture |
| Cotton | Medium-Low | Medium | Medium | Easy | Nurseries, layering, casual spaces | May shrink when wet; less durable long-term |
| Silk | Low | Very Low | High | Challenging | Formal display areas (low traffic) | Mats when wet; fragile; high cost |
| Viscose (Art Silk) | Low | Very Low | Medium | Challenging | Low-traffic decorative accents | Less durable than silk; loses luster; slippery when wet |
| Hooked Wool | High | Good | Medium | Easy | High-traffic areas, coastal homes | Limited pattern complexity |
| Vintage Kilim | Medium | Medium | Low | Moderate | Eclectic spaces, layering | Irregular sizes; may show age |
Understanding “Natural Fiber” Nuances:
– Jute: Strong but brittle. Absorbs moisture readily—stains set quickly. Suitable only for very dry environments. Always use a pad; jute backing may scratch hardwood.
– Sisal: More durable than jute but equally stain-prone. Has a distinctive coarse texture. Best with a thick pad for comfort.
– Seagrass: Naturally water-resistant (harvested from oceans). Smooth texture, subtle sheen. More stain-resistant than jute/sisal but still requires prompt spill cleanup.
– Wool Blend (Wool + Synthetic): Offers wool’s comfort with enhanced stain resistance. An 80/20 wool/polypropylene blend may suit high-traffic zones well.
Construction Quality Indicators:
– Hand-Knotted: Highest craftsmanship tier. Knots visible on back. Not reversible. Durability: Excellent. Often considered an investment piece.
– Hand-Tufted: Pile punched through canvas backing. Back has latex coating. Not reversible. Durability: Good (depends on latex quality).
– Machine-Made: Consistent patterns, accessible pricing. Check backing—woven polypropylene backing typically lasts longer than thin latex.
– Flatweave (Kilim, Dhurrie): No pile. Often reversible. Extremely durable. Ideal for high traffic. Can feel thin—always use a pad.
The Pad Imperative:
– Hardwood/Laminate: Felt or recycled felt pad. Helps prevent scratching, adds cushion.
– Tile/Stone: Rubber-grid pad. Maximizes grip; prevents slipping.
– Concrete: Combination felt/rubber pad. Adds critical insulation against cold.
– Carpeted Floors: Non-slip mesh pad. Prevents rug from sliding on pile.
– Why it matters: A quality pad protects your rug and flooring while enhancing safety. Measure rug precisely; pad should be 1–2 inches smaller on all sides to avoid visible edges.
Color & Pattern Psychology: Understanding Emotional Response
Color and pattern influence perception. Master these levers to shape how a room feels.
Color Temperature Guidance:
– Cool Colors (Blues, Greens, Grays): Tend to recede visually. May create calm, spacious, focused environments. Ideal for bedrooms, home offices, small rooms. Note: In north-facing rooms with limited light, balance with warm wood tones or lighting to avoid chilliness.
– Warm Colors (Reds, Oranges, Yellows, Terracotta): Tend to advance visually. May generate energy, coziness, appetite. Suitable for dining rooms, living rooms, entryways. Note: In small rooms, use as accents within neutral rugs to avoid overwhelm.
– Neutrals (Beige, Cream, Taupe, Charcoal): Flexible anchors. Create sophistication and calm. Critical nuance: Match undertones to your room. A cream rug (yellow undertone) may clash with gray walls (blue undertone). Hold a rug sample against the wall in natural light.
Pattern Scale & Spatial Perception:
| Pattern Scale | Suggested Room Size | Perceived Effect | Placement Tip |
|——————-|———————|————————————–|———————————————–|
| Oversized (Medallions >36″, large geometrics) | Large (>250 sq ft) | Bold, confident, modern | Center pattern under focal point (fireplace, bed) |
| Medium (Traditional florals, ikats, trellis) | Medium (150–250 sq ft) | Balanced, inviting, classic | Align pattern axis with room’s main sightline |
| Small/All-Over (Petite florals, dots, fine stripes) | Small (<150 sq ft) | Can feel busy if dominant; use sparingly | Pair with solid furniture to avoid visual clutter |
| Textural/No Pattern (Heathered, bouclé, tone-on-tone) | Any size | Calm, sophisticated, expands space | Ideal for minimalist or layered rooms needing “quiet” |
Pattern Mixing Protocol (The 3-Rule System):
1. Vary Scale: If rug has a large medallion, choose pillows with tiny dots or fine stripes.
2. Share One Color Anchor: All patterns should include one common color (e.g., rug, curtains, and art all feature olive green).
3. Balance Complexity: Pair a busy rug with solid furniture. Pair a solid rug with patterned furniture. Avoid matching pattern complexity exactly.
Addressing Common Color Challenges:
– Challenge: Rug is the only source of a bold color (e.g., bright red rug in neutral room).
Adaptation: Introduce that color in two smaller elements (throw pillows, art frame, vase) to create intentionality.
– Challenge: Rug color clashes with dominant wood tone (orange rug on red oak floors).
Adaptation: Choose a rug with a neutral base (gray, cream) and subtle hints of a complementary color (blue-gray rug can balance warm oak).
– Challenge: All-neutral room feels sterile.
Adaptation: Select a rug with subtle tonal variation (heathered charcoal, oat with ivory threads) to add depth without introducing color.
Troubleshooting Real-World Scenarios: Practical Adaptations
Even thoughtful plans meet real-world constraints. These protocols address specific challenges homeowners encounter.
Scenario: “My Furniture Is Too Big for Any Rug That Fits the Room”
Diagnosis: Common in older homes with compact rooms and modern oversized furniture.
Adaptation Path:
1. Reassess Furniture Scale: This is often the most effective long-term solution. A room strained by oversized furniture may not achieve balance with rugs alone. Consider replacing one large piece (e.g., massive sectional) with two smaller chairs + loveseat.
2. Rug Adaptation: If furniture is fixed:
– Choose the largest rug that fits without blocking pathways or door swings.
– Prioritize front legs on rug. Accept rear legs off-rug.
– A rug with a dark border may create a visual “frame” that enhances perceived size.
3. Optical Support: Paint walls a light, warm neutral (e.g., soft off-white). Light walls can recede visually, making the room feel more spacious relative to rug/furniture.
Scenario: “I Have Radiant Floor Heating—Will the Rug Damage It?”
Diagnosis: Valid concern. Rugs insulate; excessive insulation may reduce heating efficiency.
Adaptation Protocol:
– Material Choice: Low-pile wool (<0.5″) or flatweaves (sisal, polypropylene). Avoid thick shags or rubber-backed rugs.
– Coverage Limit: Avoid covering more than 70% of the heated floor area. Leave pathways and perimeter exposed.
– Pad Requirement: Use a thin, heat-conductive pad (felt, not rubber). Rubber pads may trap heat.
– Manufacturer Check: Consult your heating system’s manual. Most modern systems accommodate rugs, but verify maximum R-value (thermal resistance) allowed.
– Monitoring: Place a thermometer under rug edge and on exposed floor. If difference exceeds 5°F consistently, reduce rug size or switch to thinner material.
Scenario: “My Pet Keeps Slipping on the Hardwood—But I Dislike How Rugs Look in the Hallway”
Diagnosis: Safety need vs. aesthetic preference conflict.
Adaptation Path:
1. Targeted Placement: Install small, discreet rugs only at high-risk zones:
– Top and bottom of stairs (2’x3′ each)
– Entry point to slippery room (e.g., kitchen doorway)
2. Material Choice: Low-profile indoor/outdoor polypropylene runners with non-slip backing. Modern options mimic wool textures in neutral tones.
3. Aesthetic Integration: Choose rug color within 10% of floor tone (e.g., light gray rug on light oak). It becomes a subtle texture element.
4. Alternative: Clear anti-slip stair treads or floor grip strips—less visible than rugs but highly effective.
Scenario: “I Rent—Landlord Won’t Allow Nails/Tacks for Stair Runner”
Diagnosis: Temporary solution required without property damage.
Adaptation Protocol:
– Adhesive Choice: Use removable, residue-free double-sided carpet tape specifically rated for stairs. Apply only to rug backing—not directly to wood.
– Placement: Tape only along the nose of each tread (front edge) and top of each riser. Avoid taping the entire perimeter—this allows slight movement without buckling.
– Removal Protocol: At move-out, warm tape gently with hairdryer before peeling. Residue typically wipes clean with rubbing alcohol.
– Alternative: Heavy-duty rug grippers cut to stair dimensions. Less secure than tape but completely removable. Test on inconspicuous area first.
Scenario: “Sunlight Fades My Rug—How Do I Protect It Without Blocking Light?”
Diagnosis: UV damage is cumulative and irreversible. Prevention is key.
Adaptation Path:
– Window Film: Install clear UV-blocking window film. Blocks most UV rays while maintaining visibility. Often landlord-friendly and removable.
– Rug Rotation: Rotate rug 180 degrees every 3 months, especially in sun-drenched rooms. Ensures even fading—less noticeable than patchy spots.
– Strategic Furniture: Place large furniture (sofa, bookcase) against sunniest wall. Rug fades more evenly under furniture shadow.
– Material Choice: Solution-dyed polypropylene rugs resist fading well. Wool fades gracefully (patina); avoid silk/viscose in direct sun—they fade unevenly.
Scenario: “I Need a Rug for an Awkward Alcove/Nook—Nothing Fits Standard Sizes”
Diagnosis: Architectural uniqueness requires custom thinking.
Adaptation Protocol:
1. Measure Precisely: Sketch the nook shape. Note all dimensions, angles, obstructions (radiators, outlets).
2. Custom Cut: Many retailers offer custom cutting on select flatweaves for minimal upcharge. Provide exact dimensions.
3. Layering Strategy: Place a standard-sized rug (e.g., 5’x8′) centered in the nook. Layer a smaller complementary rug (2’x3′) or sheepskin within the primary rug to define the seating spot.
4. Alternative: Large floor cushions or a tailored floor pouf may serve the purpose without a rug.
Your Questions, Answered: Real Queries from Homeowners
Q: How much should I realistically spend on a rug?
A: Budget based on room priority and traffic. High-traffic zones (living room, entry) often warrant greater investment: $5–$10 per square foot for quality wool or polypropylene. Low-traffic zones (guest bedroom, formal dining) may use more accessible options ($2–$5/sq ft). Very low-cost rugs (<$1.50/sq ft) may shed excessively, stain readily, or contain higher levels of VOCs. Consider longevity: a $400 rug lasting 10 years may be more economical than replacing lower-quality rugs frequently.
Q: Can I put a rug over existing wall-to-wall carpet?
A: Yes—with important considerations. Use low-pile rugs (flatweaves, thin wool) with a non-slip mesh pad designed for carpeted floors. Avoid thick pads—they may create a tripping hazard at the rug’s edge. This technique can effectively define a seating area in a large carpeted room. Never use rubber-backed rugs on carpet—they may trap moisture.
Q: How do I clean a spill on a wool rug without damaging it?
A: Act promptly. Blot (never rub) with a clean white cloth. Mix 1 tsp mild wool detergent (like Woolite) + 1 cup lukewarm water. Dab gently. Blot dry. Place a fan nearby to accelerate drying. For oil-based stains, sprinkle cornstarch first to absorb oil, wait 15 minutes, then vacuum before cleaning. Avoid vinegar or harsh chemicals—they may strip wool’s natural oils. For large or stubborn spills, consult a professional rug cleaner experienced with wool.
Q: My rug arrived with creases—will they disappear?
A: Usually, yes. Unroll rug pile-side up. Place heavy books along crease lines. Leave for 24–48 hours. For stubborn creases, lightly mist the back of the rug (not the pile) with water, then place books. Never steam or iron rugs—heat can damage fibers. Creases in hand-knotted rugs may take 1–2 weeks to relax fully. This is normal and not a defect.
Q: How do I stop my rug from shedding?
A: Some shedding is normal for new wool rugs (loose fibers from weaving). Vacuum 2–3 times weekly for the first month using suction-only (no beater bar). Shedding typically subsides within 2–3 months. If excessive shedding continues beyond 6 months, the rug may be low-quality. For synthetic rugs, persistent shedding may indicate poor construction.
Q: Can I use an outdoor rug indoors?
A: Absolutely—and it’s often a smart choice for high-traffic or moisture-prone zones. Modern indoor/outdoor polypropylene rugs are soft, stylish, and highly durable. They resist stains, moisture, and fading. Ideal for kitchens, mudrooms, playrooms, basements, and homes with pets. Ensure it has a non-slip backing or use a separate pad. Many designers specify them for active households.
Q: How often should I rotate my rug?
A: Rotate 180 degrees every 6 months in medium-traffic areas. Every 3 months in high-traffic zones (entryways, under dining tables). This promotes even wear, fading, and pile direction. Mark the back of the rug with chalk indicating “North” to track rotation. For rectangular rugs in rectangular rooms, rotating maintains symmetry.
Q: What’s the difference between “hand-tufted” and “hand-knotted,” and does it matter?
A: Significantly. Hand-knotted rugs are woven knot-by-knot on a loom. The back shows an intricate pattern mirroring the front. Extremely durable; can last generations. Hand-tufted rugs are punched through a canvas backing, then glued and sheared. The back is flat with a latex coating. Less durable long-term (latex may degrade), but more affordable. For heirloom pieces or high-traffic areas, hand-knotted is often preferred. For trendy styles you may refresh in 5–7 years, hand-tufted offers value. Always inspect the back before purchasing.
Q: My rug has a chemical smell—how do I remove it?
A: Off-gassing is common with new synthetic rugs and pads. Air it outdoors for 48–72 hours in a dry, shaded area (sunlight may fade colors). If odor persists, sprinkle baking soda liberally over the entire rug, let sit 24 hours, then vacuum thoroughly. For stubborn smells, lightly mist the rug backing (not pile) with a 1:1 water/vinegar solution, then air dry completely. Never saturate—moisture may cause mildew. If smell remains after these steps, the rug may contain higher VOC levels; consider returning it, especially in homes with infants, elderly individuals, or respiratory sensitivities.
Q: How do I choose a rug for a room with multiple seating areas?
A: Treat each seating group as its own zone. Size rugs per the footprint guideline for each group. Maintain consistent 12–18 inch floor gaps between rugs. Unify the space by selecting rugs with shared color palettes (e.g., both feature navy and cream) but different patterns/scales. In very large rooms (>400 sq ft), this creates intentional “rooms within a room.” Avoid identical rugs—they may feel institutional. Instead, choose complementary designs that tell a cohesive story.
Q: Can rugs help with room acoustics?
A: Yes. Rugs absorb mid-to-high frequency sounds (footsteps, chair scrapes, voices), reducing echo and creating a calmer auditory environment. Wool rugs are particularly effective due to fiber density. For maximum impact:
– Cover 60–70% of hard floor area.
– Pair with wall textiles (curtains, tapestries) and upholstered furniture.
– In media rooms, layering a thick wool rug over a rubber underlayment may enhance sound dampening.
This is especially valuable in apartments (reducing noise transmission) and open-plan homes with hard surfaces.
Conclusion and Your 24-Hour Action Plan
Rug selection and placement is not about finding a “perfect” textile. It is about applying spatial awareness to solve human-centered challenges: creating safety where there was hazard, clarity where there was confusion, comfort where there was friction. The Triad Anchoring Framework—Spatial, Functional, Aesthetic—provides a repeatable system to transform any room from arbitrary to intentional. You now hold adaptable guidelines for sizing, material selection, placement psychology, and real-world problem-solving. This knowledge shifts you from passive observer to active spatial steward.
Recap: Three Foundational Principles
1. Spatial Integrity: The rug should define the functional zone with intentional margins (80/20 guideline, threshold principle).
2. Functional Honesty: Material and placement must serve actual human behavior—not just aesthetics.
3. Aesthetic Harmony: Color, pattern, and scale should unify the room’s visual story while respecting the first two layers.
Your 24-Hour Anchoring Step
Within the next day, complete this single, specific action:
Measure the primary furniture footprint in your most challenging room. Calculate the suggested rug size using the guidelines in this guide. Write it down. Tape the dimensions to your floor with painter’s tape. Stand back. Observe how this invisible boundary changes your perception of the space.
This tactile exercise bridges theory and reality. You’ll gain immediate insight into whether your current rug fits—or where adjustment may help. No purchase required. Just clarity.
The Bigger Picture
Every room in your home holds conversations—between architecture and inhabitant, function and feeling, past and present. A thoughtfully anchored rug participates quietly in that dialogue. It communicates: This space is considered. This zone has purpose. You belong here. In a world of transient experiences, this tangible sense of place offers profound grounding. You are not merely arranging objects. You are cultivating sanctuary—one intentional square foot at a time.
Explore Our Complete Spatial Design System:
The Furniture Scale Calculator: Avoiding the “Too Big/Too Small” Trap | Lighting Layering: Beyond Overhead Fixtures | Color Flow Mapping: Harmonizing Your Entire Home | Window Treatment Psychology: Privacy, Light, and Proportion | Acoustic Comfort: Taming Echo in Modern Spaces | The Entryway Ritual: Designing Your Daily Transition Zone