Move beyond activity fatigue with a flexible, developmentally informed approach to hands-on projects that honor your child’s curiosity, your time, and your home—without pressure or perfectionism.
Feeling caught between overly complex craft tutorials and passive screen time? Discover how everyday household items can become meaningful learning opportunities when guided by intentional yet adaptable practices. This guide offers a balanced perspective on integrating hands-on exploration into family life. You’ll find 15 carefully considered activities for ages 3–12, each designed to align with natural developmental patterns while offering multiple pathways for engagement. More importantly, you’ll gain practical strategies to observe your child’s unique cues, adapt activities to your reality, and recognize learning in its many quiet forms—because education unfolds not in flawless outcomes, but in moments of genuine connection and curiosity.
Introduction: Reimagining “Educational” in Everyday Moments
Scroll through parenting feeds or browse toy aisles, and two narratives often dominate: the meticulously staged project requiring rare supplies and uninterrupted adult focus, or the digital experience promising learning while minimizing interaction. Between these lies a gentler, more sustainable truth—learning thrives in ordinary moments when children engage authentically with materials, ideas, and supportive adults. Measuring ingredients for playdough introduces early math concepts. Negotiating roles while building a fort practices social reasoning. Observing how watercolors blend on different papers sparks scientific curiosity.
This perspective draws gently on established educational frameworks—such as Vygotsky’s concept of the zone of proximal development (learning that unfolds with responsive support) and Montessori’s emphasis on self-directed exploration—to inform practical, accessible experiences. These approaches remind us that meaningful learning rarely happens at a desk. It emerges on kitchen floors, in backyard corners, and during shared moments of wonder. The goal isn’t to add another task to your day, but to notice and nurture the learning already present in your child’s natural engagement with the world.
The Learning Layers Framework: A Sustainable Approach to Hands-On Engagement
Before exploring specific activities, consider this adaptable three-part framework. It’s designed to reduce pressure while deepening engagement—focusing on preparation, presence, and possibility rather than perfection. Think of it as gentle scaffolding: temporary support that honors your child’s growing independence.
Layer 1: Foundation – Preparing with Intention
This phase happens before materials appear. Small, thoughtful choices here prevent frustration and invite calm participation.
Developmental Alignment Check: Consider your child’s current interests and abilities. A three-year-old benefits from large, washable materials and clear, simple steps (“Pour the blue water”). A nine-year-old may seek autonomy in designing challenges (“Create a bridge that holds these coins”). Observe quietly: Do they persist through small obstacles? Do they seek help readily? Use these cues. For mixed-age groups, assign complementary roles—perhaps the younger child decorates pre-cut shapes while an older sibling handles structural choices.
Material Curation Strategy: “Easy” means working with what you have. Before gathering supplies:
– Glance at your recycling bin (cardboard tubes, clean containers)
– Check kitchen drawers (measuring spoons, dried beans, cloth scraps)
– Consider repurposed textiles (old t-shirts, mismatched socks)
Maintain a low-effort “creation station”—a bin with rotating basics like child-safe scissors, washable glue sticks, crayons, and string. When materials are accessible, children often initiate play independently. For recurring activities, store components in labeled bags (e.g., “Marble Run Kit: tubes, tape, pom-pom”). This reduces setup time significantly.
Environment Engineering: Where matters as much as what. Cover surfaces with a vinyl tablecloth or flattened cardboard box for easy cleanup. For water-based or sensory play, use a shallow plastic bin to contain materials. Position near a sink if possible. These subtle adjustments ease adult anxiety, allowing you to be fully present rather than preoccupied with mess.
Layer 2: Exploration – Being a Responsive Partner
This is the heart of the experience: the doing, testing, and discovering. Your role shifts from director to curious companion. Avoid taking over to “fix” the outcome, and resist stepping away entirely. Instead, offer gentle, timely support.
The Question Ladder Technique: Replace generic praise with open-ended prompts that invite reflection:
– Observation: “What do you notice about how the colors change?”
– Prediction: “What might happen if we add more water?”
– Problem-Solving: “The tower keeps tipping. What could make the base more stable?”
– Reflection: “How did you figure that out?”
These questions nurture metacognition—the ability to think about one’s own thinking—helping children internalize processes rather than just completing steps.
Honor Productive Struggle: When frustration arises (tape won’t stick, a structure collapses), pause. Breathe. Offer minimal support: “Your hands seem tired. Would trying the tape on the other side help?” Struggle within reach isn’t failure—it’s where resilience and understanding grow. Research in child development suggests that navigating manageable challenges supports cognitive and emotional growth. The value lies not in a flawless result, but in the thoughtful effort along the way.
Document Gently: Capture moments without disrupting flow. A quick photo of hands at work. A whispered quote noted later: “The shadow got longer when I moved the light.” These become quiet anchors for future reflection—“Remember when tying knots felt tricky? Look how you secured this sail!” Documentation validates effort and makes learning visible over time.
Layer 3: Extension – Following Curiosity Forward
Extension transforms a single activity into ongoing inquiry—without demanding more time or supplies. It answers “What next?” in ways that feel organic.
Cross-Domain Connections: After building a cardboard city (engineering), gently suggest:
– Literacy: “Could we add street signs? What words would drivers need?”
– Math: “How many windows does your tallest building have? Let’s count by twos.”
– Social Studies: “Where would the park go? Why there?”
– Science: “How would rain (from a spray bottle) flow off this roof?”
Interest-Led Iteration: Did your child linger over marble run curves? Tomorrow, wonder aloud: “Could we design a path where the marble stops right at the red cup?” Building on existing curiosity feels like progression, not pressure.
Real-World Links: After making seed paper (Activity 7), plant it together. Track sprouts in a simple journal. Chat about how reusing paper helps trees. When learning connects to lived experience, understanding deepens naturally.
A Guiding Thought: Meaningful engagement isn’t measured by project complexity, but by the child’s authentic involvement and the adult’s responsive presence. A paper boat redesigned three times after sinking holds rich learning; a perfectly assembled kit completed under direction may hold little.
Choosing Activities Thoughtfully: A Flexible Guide for Diverse Needs
Age ranges offer starting points—observe your child’s readiness. Use this guide to filter activities before beginning. Notice cues like sustained attention, frustration tolerance, and expressed interest.
| Age Group | Developmental Focus | Activity Traits That Resonate | Consider Avoiding | Typical Engagement Window | Gentle Mess Management Tips |
|---|---|---|---|---|---|
| Toddlers (2–3) | Sensory exploration, cause-effect | Large parts (>1.75″), immediate results, ≤3 steps | Small parts, abstract goals | 10–15 minutes | High chair or bathtub setup; edible paints (yogurt + food coloring) |
| Preschoolers (4–5) | Symbolic play, early literacy/numeracy | Story links (“Let’s build the three bears’ chairs!”), sorting elements | Rigid “right way” outcomes | 20–30 minutes | Vinyl tablecloth; damp cloth nearby for quick wipes |
| Early Elementary (6–8) | Problem-solving, detail focus | Multi-step choices, hidden challenges | Activities feeling too simplistic | 30–45 minutes | Define a “creation zone”; involve child in prep/cleanup |
| Older Children (9–12) | Abstract thinking, autonomy | Open-ended design, research angles, teaching others | Overly directed tasks | 45–60+ minutes | Shift responsibility: “You manage the space; I’ll handle disposal” |
Adapting to Individual Needs:
– For nature enthusiasts: Turn weaving (Activity 10) into a seasonal collection project. Compare leaf textures across months.
– For children hesitant about writing: Embed words naturally—label marble run parts (“steep drop”), script three lines for shadow puppets (Activity 8).
– For sensory sensitivities: Offer choices upfront: “Brush or fingers for paint?” Start with dry materials (rice, beans) before introducing wet elements. Provide noise-reducing headphones if helpful.
– For wide age gaps: Assign tiered roles. In nature weaving, an older child gathers and sorts materials; a younger sibling places items into pre-made slots. Celebrate combined contributions: “Your strong weaving and Maya’s flower choices made this beautiful!”
Fifteen Adaptable Activities with Developmental Insights
Each activity includes:
✅ Why It Resonates (developmental perspective)
✅ Material Pathways (Ideal / Pantry Swap / Minimal Version)
✅ Gentle Guidance (common moments + supportive responses)
✅ Extension Ideas (Layer 3 connections)
✅ Safety Considerations (age-aware precautions)
Activity 1: Calm-Down Sensory Bottles (Ages 2–6)
Learning Connections: Emotional awareness, visual focus, cause-effect observation
Time Estimate: 15 minutes active + drying time
Materials:
– Ideal: Clear plastic bottle (16oz), glitter glue, fine glitter, clear dish soap, warm water, sealant (adult use)
– Pantry Swap: Clean spice jar, corn syrup, sequins/pasta shapes, vegetable oil
– Minimal: Small yogurt cup covered tightly with plastic wrap + rubber band, water, food coloring
How to Explore:
1. Ensure container is dry inside. Remove labels.
2. Fill ¾ full with warm water.
3. Add 2 tbsp glitter glue (or 3 tbsp corn syrup) and 1 tsp dish soap (slows movement).
4. Sprinkle in glitter or sequins. Tip: Use calming color themes—blue for “ocean calm,” green for “forest peace.”
5. Secure lid tightly. For permanence, apply sealant around rim once dry (adult step).
6. Shake gently. Watch particles swirl and settle.
Why It Resonates: Tracking the slow descent of glitter can support visual focus and provide a tangible metaphor for emotions (“Big feelings swirl, then settle”). Many child development resources note that predictable sensory tools may help some children regulate overwhelming sensations. The process also builds fine motor control during pouring and sealing.
Gentle Guidance:
– Leaking concern: Test seal with water first. Reinforce lid with strong tape if not sealing permanently.
– Cloudy water: Distilled water reduces cloudiness from minerals.
– Overstimulation: For sensitive children, reduce glitter amount or use larger, slower-moving items like beads in oil.
Extension Ideas:
– Science link: “What happens with oil instead of water? Why does glitter sink here but float there?”
– Emotion link: After reading The Color Monster by Anna Llenas, create bottles representing different feelings (red for frustration, yellow for joy).
– Time link: Use a timer: “How long until the glitter settles?” Compare gentle vs. firm shakes.
Safety Considerations: Use plastic containers only. For children under 3, treat as an adult-held observation tool, not a shake toy. Supervise closely. Seal permanently if intended for independent handling.
Activity 2: Cardboard Tube Marble Path (Ages 4–10)
Learning Connections: Physics concepts (gravity, motion), spatial reasoning, iterative design
Time Estimate: 30–60 minutes (easily paused/resumed)
Materials:
– Ideal: Cardboard tubes (paper towel, toilet paper), masking tape, marbles, large cardboard backboard
– Pantry Swap: Rolled magazines secured with rubber bands, plastic straws split lengthwise, dried beans as “rollers”
– Minimal: 3 tubes, tape, balled-up foil or pom-pom
How to Explore:
1. Tape cardboard backboard vertically to a stable surface (wall, cabinet).
2. Demonstrate taping one tube at a slight downward angle. Release roller—does it move? Adjust together.
3. Invite: “Can you guide the roller from top to bottom?”
4. Encourage testing after each addition. Frame “failures” gently: “The roller flew off here—what might keep it on track?”
5. Add complexity only if interest continues: curves, tunnels, or a target cup.
Why It Resonates: This embodies a gentle design cycle: imagine, try, observe, adjust. Children explore physics intuitively through trial. The open structure allows diverse engagement—a younger child creates a straight path; an older child experiments with angles. Educational perspectives suggest that early, playful exposure to iterative problem-solving may support later confidence in tackling complex challenges.
Gentle Guidance:
– Tubes detaching: Press tape firmly along seams. Reinforce junctions with extra tape “collars.”
– Roller jams: Overlap tube ends slightly for smoother transitions.
– Frustration: Normalize testing: “Engineers try many versions! What did this attempt teach us?”
Extension Ideas:
– Measurement: “How many tubes long is your path?” Use a ruler for older children.
– Art integration: Decorate tubes with washi tape before assembly.
– Challenge: “Can you make the roller take exactly 8 seconds to reach the bottom?” Use a timer.
Safety Considerations: Supervise closely with children under 5 regarding small rollers. Use large pom-poms or foil balls for toddlers. Ensure backboard is securely anchored.
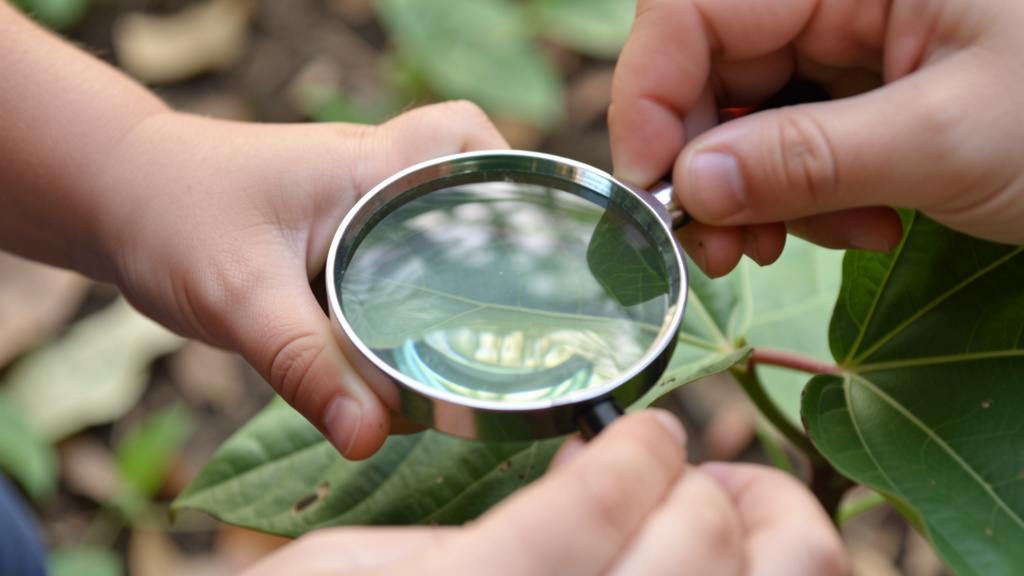
Activity 3: Nature Texture Rubbings (Ages 3–8)
Learning Connections: Sensory discrimination, fine motor control, observation skills
Time Estimate: 20 minutes
Materials:
– Ideal: Butcher paper or contact paper (sticky side up), unwrapped crayons, collected flat natural items
– Pantry Swap: Flattened brown paper bag, pencil, household textures (keys, lace, coins)
– Minimal: Single sheet of paper, crayon nub, leaf from a houseplant
How to Explore:
1. Take a slow “texture walk” outdoors or around home. Collect 3–5 flat items with interesting surfaces (fallen leaves, bark scraps, feathers).
2. Place item under paper. Hold firmly.
3. Rub crayon sideways (not tip) gently over the area. Watch texture emerge!
4. Label discoveries simply: “Maple leaf,” “Brick wall.”
5. Optional: Mount rubbings on cardboard to create a “texture collection.”
Why It Resonates: This low-pressure technique strengthens hand muscles and bilateral coordination (using both hands together). It cultivates close observation—children notice vein patterns or wood grain they might otherwise overlook. For children developing writing skills, the controlled rubbing motion builds foundational hand control in a non-academic context.
Gentle Guidance:
– Faint impressions: Use dark crayons (black, brown); press firmly but slowly.
– Shifting items: Tape delicate pieces (feathers) to paper first. For contact paper, press items directly onto sticky surface, then cover.
– Overwhelm: Start with just two items. Focus on quality of noticing over quantity.
Extension Ideas:
– Classification: Sort rubbings: “Which came from plants? Which from things people made?”
– Seasonal journal: Repeat monthly in the same spot. Notice how textures change.
– Story spark: “This rubbing looks like dragon scales! What story lives here?”
Safety Considerations: Collect only fallen items. Teach gentle respect for living plants. Wash hands after handling soil or unknown plants. Avoid areas with poison ivy or sharp debris.
Activity 4: Simple Balance Scale (Ages 5–10)
Learning Connections: Weight comparison, relational thinking, hypothesis testing
Time Estimate: 25 minutes
Materials:
– Ideal: Wire hanger, 2 identical paper cups, string, hole punch, uniform small weights (pennies, LEGO bricks)
– Pantry Swap: Ruler balanced on a pencil taped to table, 2 yogurt containers suspended by rubber bands
– Minimal: Coat hanger, 2 small paper bags, tape
How to Explore:
1. Punch two holes opposite each other near the rim of each cup.
2. Thread 12-inch strings through holes; tie securely.
3. Tie cup strings to opposite ends of the hanger.
4. Suspend hanger from a stable hook or have an adult hold the top.
5. Test balance: Add identical items to both sides. Adjust cup positions until level.
6. Experiment gently: “How many beans balance one LEGO brick?”
Why It Resonates: This makes abstract concepts like “heavier/lighter” visible and tactile. Children explore equivalence and variables—foundational ideas for later math. Unlike digital scales, this tool reveals relationships between objects, supporting deeper conceptual understanding. Educational resources note that concrete manipulatives can help children develop intuitive number sense.
Gentle Guidance:
– Uneven hanging: Ensure strings are equal length. Test with identical weights first.
– Cups tipping: Punch holes closer to the rim. Use wider containers if needed.
– Imbalance frustration: Frame positively: “The scale is showing us something! What small change might help?”
Extension Ideas:
– Prediction chart: “Guess how many pennies equal this eraser. Let’s test!”
– Kitchen math: “The recipe needs ‘10 pennies’ of flour. How many LEGO bricks is that?”
– Redesign challenge: “How could we make this hold heavier treasures?”
Safety Considerations: Adult supervision with hole punch. Ensure hanging location is stable and clear of foot traffic. Avoid very heavy objects.
Activity 5: Story Prompt Dice (Ages 4–12)
Learning Connections: Narrative thinking, vocabulary use, creative expression
Time Estimate: 20 minutes to create + ongoing use
Materials:
– Ideal: 6 wooden blocks or large dice, acrylic paint pens, jar for storage
– Pantry Swap: Toilet paper tubes sealed at one end with tape, markers
– Minimal: Paper squares folded into cubes, crayons
How to Explore:
1. Divide each cube face into simple categories: Characters, Places, Problems, Objects, Actions, Feelings.
2. Draw clear, recognizable icons (e.g., Character: cat, astronaut; Place: forest, bakery).
3. Place dice in a decorated jar labeled “Story Starters.”
4. To play: Roll dice. Create a story using the shown elements.
5. For younger children: Roll just two dice (“Who?” and “Where?”).
Why It Resonates: Gentle constraints can ease creative pressure. This activity supports working memory (holding multiple ideas) and narrative sequencing. For children hesitant to speak or write, visual prompts lower barriers. The physical act of rolling adds playful anticipation, framing storytelling as joyful exploration rather than performance.
Gentle Guidance:
– Unclear icons: Keep drawings simple. Test with your child: “What does this picture say to you?”
– Story blocks: Offer starters: “One day, the astronaut cat found a crying robot in the bakery…”
– Competition: Emphasize there’s no “right” story. Take turns adding one sentence.
Extension Ideas:
– Writing: Record favorite stories in a “Family Adventures” notebook. Illustrate together.
– Drama: Act out stories with stuffed animals.
– Perspective shift: “Roll again—how would the story change if the feeling was ‘brave’ instead of ‘scared’?”
Safety Considerations: For children under 3, use large tubes or paper cubes. Supervise small dice.
Activity 6: Ice Excavation Exploration (Ages 3–8)
Learning Connections: States of matter, patience, tool exploration
Time Estimate: 10 minutes setup + 30–60 minutes play
Materials:
– Ideal: Small toys, water, freezer container, salt, droppers, warm water, child-safe tools (plastic spoon)
– Pantry Swap: Frozen juice cup with fruit inside, salt shaker, spoon
– Minimal: Ice cube tray with small item frozen inside, bowl of warm water
How to Explore:
1. Place small toys in container. Cover with water. Freeze overnight.
2. Pop ice block into a shallow bin (to catch meltwater).
3. Offer tools: droppers with lukewarm water, salt shaker, spoons.
4. Wonder aloud: “How can we free the treasures? What melts ice fastest—salt, water, or rubbing?”
5. Observe together: “Where do puddles form first? Why does salt make the ice cloudy?”
Why It Resonates: This multisensory experience makes science concepts tangible. Children witness phase changes in real time. The deliberate pace encourages sustained attention—a gentle counterbalance to fast-paced digital experiences. Activities requiring controlled tool use (squeezing droppers) may support fine motor development. The open-ended nature invites children to form their own methods, embodying authentic inquiry.
Gentle Guidance:
– Very hard ice: Use lukewarm (not hot) water. A pinch of salt in freezing water creates slightly softer ice.
– Slow progress: Set a gentle timer: “Let’s see how many we free in 5 minutes!”
– Mess concerns: Do outdoors, in a bathtub, or on an easy-clean surface. A turkey baster reduces spills vs. cups.
Extension Ideas:
– Real-world link: “This is like archaeologists freeing fossils! Or scientists studying ice cores.”
– Recording: Count rescued items. Make a simple chart: “Which tool worked fastest?”
– Sensory variation: Freeze herbs or flower petals for “magic potion” play. Add food coloring before freezing.
Safety Considerations: Constant adult supervision near water. Use non-toxic toys. Avoid metal tools. Supervise salt use (small amounts only; not for tasting).
Activity 7: Seed Paper Creations (Ages 4–10)
Learning Connections: Life cycles, environmental awareness, fine motor practice
Time Estimate: 25 minutes active + days for growth
Materials:
– Ideal: Scrap paper (non-glossy), blender (adult use), water, wildflower seeds, mesh strainer, towel
– Pantry Swap: Pre-made seed paper, cookie cutters for shapes
– Minimal: Store-bought seed paper, small pot, soil
How to Explore:
1. Tear paper into small pieces. Cover with warm water. Soak 1+ hours.
2. Adult step: Blend soaked paper with fresh water until pulpy (like oatmeal).
3. Stir in 1 tsp seeds per cup of pulp.
4. Pour pulp into strainer. Press flat to desired thickness (¼ inch).
5. Flip onto towel. Press with second towel to absorb moisture.
6. Air-dry 24–48 hours. Cut into shapes. Write messages: “Watch me grow!”
7. To plant: Place on soil, cover lightly, water gently.
Why It Resonates: This connects creation with consequence—repurposing paper into new paper, then nurturing life. It makes abstract ideas like growth cycles and sustainability visible. The tactile papermaking process develops hand strength. Caring for a sprouting plant may foster responsibility and provide gentle evidence of nurturing actions. Some educational perspectives link gardening activities with increased environmental awareness and calm.
Gentle Guidance:
– Paper too thick: Press pulp thinner. Thicker paper takes longer to decompose when planted.
– Seeds not sprouting: Use fresh seeds. Keep soil moist (not soggy). Place in indirect light.
– Blender safety: Adults handle blending. Show child the pulp transformation afterward.
Extension Ideas:
– Growth journal: Sketch the sprout daily. Measure height with a ruler.
– Local connection: Research which wildflowers grow naturally near you. Discuss native plants.
– Gift idea: Make cards for grandparents with planting instructions.
Safety Considerations: Adult supervision with blender. Avoid glossy paper (coatings). Choose region-appropriate, non-invasive seeds. Wash hands after handling soil.
Activity 8: Shadow Play Theater (Ages 3–9)
Learning Connections: Light properties, storytelling, spatial awareness
Time Estimate: 20 minutes setup + ongoing play
Materials:
– Ideal: White sheet/paper, cardboard, scissors, sticks, tape, flashlight
– Pantry Swap: Brown paper bag puppets, phone flashlight, doorway as stage
– Minimal: Hands only (classic shadow shapes), lamp with shade removed
How to Explore:
1. Create a screen: Tape white paper to a wall or cardboard frame.
2. Make puppets: Trace child’s hand for animals. Cut simple silhouettes from cardboard. Tape to sticks.
3. Darken room. Shine light behind screen toward puppets.
4. Experiment: Move puppet closer to light (shadow grows). Farther away (shadow shrinks).
5. Perform stories! Add sound effects or music.
Why It Resonates: This demonstrates light concepts simply—light travels straight, opaque objects create shadows, distance changes size. Moving puppets builds spatial reasoning. Puppetry can provide emotional safety; children often express thoughts through characters they wouldn’t state directly. Collaborative roles (one holds light, one performs) nurture teamwork.
Gentle Guidance:
– Faint shadows: Use a bright, focused light (LED flashlight). Ensure room is dim.
– Complex puppets: Start with silhouettes. Details disappear in shadow.
– Short attention: Keep initial stories brief. “Show me how the rabbit hops!”
Extension Ideas:
– Science exploration: “What happens with two flashlights? Can we make two shadows?” Test sheer vs. solid materials.
– Cultural connection: Learn about shadow puppet traditions (Wayang Kulit in Indonesia).
– Recording: Film a short puppet show. Add voices later.
Safety Considerations: Supervise scissors use. Avoid laser pointers. Secure electrical cords. Prefer battery-operated lights.
Activity 9: Sound Shakers (Ages 2–7)
Learning Connections: Sound discrimination, rhythm exploration, sensory input
Time Estimate: 15 minutes
Materials:
– Ideal: Plastic Easter eggs, duct tape, fillers (rice, beans, bells), decorative paper
– Pantry Swap: Small yogurt containers with lids, rubber bands, dried pasta
– Minimal: Sealed ziplock bag with beans, held tightly by adult
How to Explore:
1. Fill containers ⅓ full with chosen material.
2. Secure lids very well with strong tape (duct tape recommended).
3. Decorate exteriors with markers or washi tape.
4. Shake and compare: “Which sounds like rain? Which is loudest?”
5. Create rhythms: Shake to a favorite song. Build a “family symphony.”
Why It Resonates: Distinguishing sounds supports auditory processing skills linked to language development. The shaking motion provides rhythmic sensory input that some children find regulating. Creating their own instrument fosters ownership and pride. Comparing sounds (“rice vs. beans”) builds observational skills.
Gentle Guidance:
– Leaks: Test seal over sink before decorating. Double-tape all seams. For eggs, wrap entire seam.
– Sensory overload: Offer noise-reducing headphones. Start with quieter fillers (cotton balls).
– Choking concern: Use large containers for young children. Supervise closely.
Extension Ideas:
– Sorting game: Group shakers by sound (loud/soft). Blindfolded guessing.
– Global sounds: Listen to music featuring shakers (maracas, shekere).
– Counting rhythms: “Shake 4 times fast, then 2 times slow.”
Safety Considerations: ABSOLUTELY SECURE LIDS. Test vigorously before giving to child. For children under 3, use large containers only with constant supervision. Avoid small fillers like beads with toddlers.
Activity 10: Nature Weaving (Ages 4–10)
Learning Connections: Pattern recognition, fine motor control, appreciation of natural materials
Time Estimate: 25 minutes
Materials:
– Ideal: Cardboard rectangle (cereal box), yarn, collected natural items
– Pantry Swap: Paper plate with slits cut around edge, string, fabric scraps
– Minimal: Fork with yarn woven through tines, small twigs
How to Explore:
1. Cut cardboard into 6″x8″ rectangle. Cut ½-inch slits along top and bottom edges.
2. Thread yarn vertically through slits to create “warp” threads. Tape ends securely.
3. Take a gentle walk. Collect flexible, flat items: grasses, leaves, flower stems.
4. Weave items horizontally over and under warp threads.
5. Secure ends with tiny glue dots if needed. Display with pride!
Why It Resonates: Weaving develops bilateral coordination and hand strength—skills supporting writing readiness. Sorting materials by size or color reinforces classification. The rhythmic motion and focus on natural textures can feel calming. Working with organic, imperfect materials may reduce pressure for “perfect” results common with digital tools.
Gentle Guidance:
– Yarn slipping: Tape warp threads firmly to cardboard back. Use thicker yarn for beginners.
– Fragile materials: Choose sturdy leaves (maple, magnolia). Press delicate flowers first.
– Pattern frustration: Start with wide spacing between warp threads. Use contrasting yarn colors.
Extension Ideas:
– Pattern play: Create ABAB sequences (green leaf, brown twig…). Try ABCABC.
– Seasonal art: Make four weavings—one for each season—using representative materials.
– Cultural appreciation: Explore images of Navajo weaving or Japanese bamboo crafts.
Safety Considerations: Supervise scissors use for cutting cardboard. Teach respectful collection: “Take only fallen items; leave living plants.” Wash hands after handling soil or plants. Avoid toxic plants.
Activity 11: Custom Memory Match (Ages 3–8)
Learning Connections: Visual memory, focus, matching skills
Time Estimate: 20 minutes to create + ongoing play
Materials:
– Ideal: 20 index cards, markers, stickers
– Pantry Swap: Cereal box cut into squares, magazine pictures glued on
– Minimal: Paper plates drawn on with crayons
How to Explore:
1. Create 5–10 matching pairs. Options:
– Themed: Animals, shapes, family photos
– Learning-focused: Letters (A/a), numbers (5/five dots), emotions (happy face)
– Personal: “Things in Our Kitchen,” “Favorite Toys”
2. Decorate simply. Laminate or cover with clear tape if possible.
3. Shuffle. Place face down in a grid.
4. Players take turns flipping two cards. Match? Keep them! No match? Flip back.
5. Celebrate effort: “You remembered where the dog was!”
Why It Resonates: This strengthens working memory—the mental workspace for holding and using information. Customizing content makes learning personally meaningful. Turn-taking practices patience and grace. For children with attention differences, the physical act of flipping cards provides helpful movement within focus.
Gentle Guidance:
– Too many pairs: Start with 3–4 pairs for young children. Increase gradually.
– Card wear: Laminate or use cardstock. Store in a ziplock bag.
– Competition stress: Play cooperatively: “Can we find all matches together before the timer rings?”
Extension Ideas:
– Difficulty shift: Add “challenge cards” (wildcards for extra turns).
– Thematic sets: Create matches for current interests (dinosaur names, local birds).
– Screen alternative: Replace digital memory games with this tactile version.
Safety Considerations: Use rounded-tip scissors if child helps cut. Avoid small stickers that could peel off for toddlers.
Activity 12: Sink or Float Lab (Ages 2–6)
Learning Connections: Prediction, material properties, scientific thinking
Time Estimate: 15 minutes
Materials:
– Ideal: Clear container, water, tray (for spills), small objects
– Pantry Swap: Kitchen sink, bowl of water, household items
– Minimal: Cup of water, 3 items (coin, cork, plastic toy)
How to Explore:
1. Gather safe objects: metal spoon, cork, plastic toy, leaf, coin, eraser.
2. Draw two columns: “Sink” and “Float.”
3. Predict: “What do you think will happen to the leaf? Draw your guess.”
4. Test: Gently place each item in water. Observe. Sort into columns.
5. Discuss: “Why did the heavy leaf float but the light coin sink? It’s about what’s inside!” (Simplify: “How tightly packed the material is.”)
Why It Resonates: This introduces scientific thinking simply: wonder, guess, test, reflect. Children learn predictions aren’t “right or wrong”—they’re starting points for discovery. The hands-on nature makes concepts like density tangible. Building descriptive vocabulary (“floats,” “sinks,” “buoyant”) supports language growth.
Gentle Guidance:
– Water spills: Place container inside a larger tray. Keep towels nearby. Work near a sink.
– Misconceptions: Avoid “heavy things sink.” Note: “A heavy boat floats because of its shape!” Focus on material properties.
– Short attention: Test just 3–4 items initially. Add more if engaged.
Extension Ideas:
– Engineering: “Can you shape this clay to float? What if we make a boat?”
– Nature link: Test pinecones, acorns, feathers. Discuss why ducks float.
– Recording: Take photos of predictions vs. results. Add to a “Science Journal” page.
Safety Considerations: Constant adult supervision near water. Use shallow containers (2–3 inches deep). Never leave child unattended. Avoid electrical items or dissolving objects.
Activity 13: Personal Puzzle Maps (Ages 4–10)
Learning Connections: Spatial reasoning, geography, fine motor practice
Time Estimate: 20 minutes
Materials:
– Ideal: Printed map (neighborhood, state), cardboard backing, glue, markers
– Pantry Swap: Magazine map page, cereal box for backing
– Minimal: Draw a simple map of your home together, cut into pieces
How to Explore:
1. Choose a meaningful map: child’s bedroom, local park, home state.
2. Glue map to cardboard. Let dry completely.
3. Adult: Cut into 6–12 puzzle pieces (fewer for younger children; irregular shapes for older).
4. Mix pieces. Invite child to reassemble.
5. Extension: Color-code borders. Add landmarks with stickers (“Grandma’s house!”).
Why It Resonates: Puzzles strengthen visual-spatial skills linked to math and reading. Using personally relevant maps transforms abstract geography into meaningful knowledge. A child assembling their neighborhood puzzle internalizes spatial relationships. Creating the puzzle themselves increases investment and retention compared to pre-made versions.
Gentle Guidance:
– Frustration: Start with 4 large pieces. Increase complexity gradually.
– Lost pieces: Store in a labeled envelope. Take a photo of the completed puzzle as a reference.
– Map complexity: Simplify first attempts. Trace major borders only.
Extension Ideas:
– Storytelling: “Create a journey! Start at home. Where do you go? What do you see?”
– History link: Compare an old map of your town to a new one. “What buildings are new?”
– Global connection: Make puzzles of places important to your family. Learn one fact about each.
Safety Considerations: Adult handles cutting puzzle pieces. Use child-safe scissors for older children on simpler cuts. Avoid small pieces for children under 3.
Activity 14: Feeling Charades (Ages 3–8)
Learning Connections: Emotional vocabulary, empathy, nonverbal communication
Time Estimate: 15 minutes to create + 10-minute games
Materials:
– Ideal: Index cards, markers, simple emotion faces
– Pantry Swap: Paper scraps, crayons
– Minimal: No cards needed—use faces and bodies!
How to Explore:
1. Draw simple faces showing emotions: happy, sad, angry, surprised, calm.
2. For older children: Add gentle scenarios: “You dropped your snack,” “You found a lost toy.”
3. Shuffle cards. Player picks one, acts out the feeling without words.
4. Others guess. Discuss: “What clues showed she was surprised?”
5. Crucial step: “When did YOU feel this way recently?” Normalize all emotions.
Why It Resonates: Naming feelings builds emotional literacy—a foundation for mental well-being, conflict resolution, and relationships. Acting engages the whole body, reinforcing understanding. Organizations like CASEL note that explicit emotion education can support positive social development. For neurodivergent children, visual cues provide concrete references for internal experiences.
Gentle Guidance:
– Judgmental language: Avoid “good/bad” emotions. Use “comfortable/uncomfortable” or “big/small” feelings.
– Shyness: Start with two players. Let child choose cards.
– Overwhelm: Focus on 3–4 emotions per session. Revisit favorites.
Extension Ideas:
– Coping strategies: “When you feel frustrated like this card, what helps you feel calm?” Create a “Calm Choices” list.
– Book link: Read The Way I Feel by Janan Cain. Match illustrations to cards.
– Family check-in: Use cards at dinner: “Pick a card showing how your afternoon felt.”
Safety Considerations: Create emotional safety. Never force sharing. Validate all feelings: “It’s okay to feel scared. Everyone does sometimes.”
Activity 15: Family Growth Record (Ages 3–12)
Learning Connections: Measurement, time awareness, self-recognition
Time Estimate: 30 minutes setup + periodic updates
Materials:
– Ideal: Long paper roll, ruler, markers, child’s handprint
– Pantry Swap: Doorframe with pencil marks, decorated ruler taped beside it
– Minimal: Large paper taped to wall, crayon
How to Explore:
1. Secure paper vertically on a stable surface (closet door, dedicated board).
2. Mark current height. Trace hand or foot beside it.
3. Label gently: “June 2024 – Age 5.”
4. Decorate background: Paint sky at top, grass at bottom. Add small family photos at different heights.
5. Measure quarterly. Connect marks with a “growth vine” or path.
Why It Resonates: This makes abstract concepts (time, growth) visible and personal. Children develop number sense through repeated measurement. The handprint provides concrete evidence of change—powerful for young children grasping time. Seeing their place within a family timeline (“You were this tall when baby brother was born”) can foster belonging. Unlike commercial charts, a DIY version becomes a cherished record of shared moments.
Gentle Guidance:
– Wall concerns: Use removable tape. Place on a movable board.
– Height sensitivity: Focus on celebration: “Your body is growing strong!” Avoid sibling comparisons.
– Consistency: Measure barefoot, against the same surface, at similar times of day.
Extension Ideas:
– Growth journal: Record heights in a notebook. Note milestones: “Loves building towers,” “Started riding bike.”
– Memory keeper: Beside each mark, add a small photo and brief note.
– Gentle projection: “If you grow about this much each year, how tall might you be at age 10?”
Safety Considerations: Ensure measuring surface is stable. Never stand on unstable chairs. Use a level for straight lines.
Navigating Everyday Realities: Mess, Time, and Multiple Ages
Even thoughtful activities meet real life: unexpected meltdowns, tight schedules, overflowing sinks. Sustainable engagement means adapting with grace—not perfection. These strategies honor your energy while preserving the activity’s spirit.
Working With Mess: Practical Containment
Mess isn’t failure—it’s evidence of engagement. Strategic containment makes cleanup manageable.
The Shared Reset Ritual:
– Before: Set a 5-minute timer. “Let’s get ready together!” Assign micro-tasks: “You grab cups; I’ll get water.”
– During: Keep a small bin nearby for stray materials. Place a damp cloth within reach.
– After: Reset timer. Play upbeat music. “You collect blue items; I’ll wipe the table.” Celebrate completion: “We reset our space together!”
Material-Specific Tips:
– Paint/Water: Use muffin tins as palettes. Place artwork inside a shallow baking sheet.
– Glitter: Work inside a large cardboard box. Spray adhesive on paper first—glitter adheres better, flies less.
– Small Parts: Sort beads or buttons in egg cartons. Fewer items on the table = less scatter.
– Outdoors: Lay an old sheet. “Everything stays on our green mat!”
Embrace “Functional Reset”:
Perfection drains sustainability. Aim for “ready for next use,” not spotless. Wipe surfaces. Return major items to bins. Leave a stray bead for tomorrow’s “treasure hunt.” Your calm presence matters far more to your child’s sense of security than microscopic tidiness. As child development perspectives consistently note, a regulated adult is the most valuable resource in any learning environment.
When Minutes Are Limited: Micro-Moments of Connection
You don’t need hours. Learning weaves naturally into daily rhythms:
– Breakfast math: “Put 3 blueberries on your oatmeal. Add 2 more. How many now?”
– Commute vocabulary: “Find something transparent (window), rough (brick wall).”
– Laundry sorting: “Match the socks! Sort shirts by color.” (Classification practice)
– Dinner prep observation: “Watch the pasta—why does it sink, then float?”
– Bedtime reflection: “What was one tricky thing you figured out today?”
These “learning snacks” normalize curiosity as part of life, not a separate task. Consistency matters more than duration—five minutes of genuine connection builds stronger neural pathways than infrequent marathons. They preserve weekend energy for deeper projects while honoring busy weekdays.
Engaging Multiple Ages: Designing for Collaboration
Sibling dynamics thrive with intentional design:
Tiered Roles in Action (Marble Path Example):
– Toddler (2–3): Places pre-cut tubes into adult-held position. Drops the roller.
– Preschooler (4–5): Tapes tubes with guidance. Chooses roller colors.
– School-age (6–8): Designs the layout. Tests angles. Records observations.
– Older child (9+): Creates challenge cards (“Make a path with 3 turns”). Times runs.
Shared Goals Over Individual Output:
– “Let’s build a zoo where each animal has a home.” (Younger decorates habitats; older researches animal needs)
– “We’re making a family storybook. You draw the cover; I’ll write the words.”
Celebrate combined effort: “Your strong base AND your sister’s decorations made this amazing!”
Gentle Conflict Navigation:
– Before: “Today, we’re a team. Our goal is fun.”
– During tension: “I see two great ideas. How can we blend them?”
– After: “What did you appreciate about working with your sibling?”
This approach transforms potential friction into mutual appreciation. Siblings practice negotiation, empathy, and the quiet joy of creating something together—skills that extend far beyond the activity.
Safety as Shared Care: Safety practices for children’s activities, as highlighted by organizations like the American Academy of Pediatrics, emphasize non-toxic materials, age-aware choking hazard awareness, and supervised tool use. Every activity here includes adaptable safety considerations. When uncertain, prioritize your attentive presence—your calm observation is the most effective safety tool.
Your Questions, Answered
Q: How do I know if an activity is too advanced for my child?
A: Watch for readiness cues. Green light: Leaning in, asking questions, persisting through mild challenge. Yellow light: Sighing frequently, avoiding materials, asking “Are we done?” Red light: Tears, throwing materials, shutting down. If you see yellow or red, scale back gently: reduce steps, simplify materials, or shift to observation (“You direct me—I’ll build”). Temporary challenge builds resilience; chronic frustration builds avoidance. Meet your child where they are today.
Q: What if my child loses interest halfway through?
A: This is valuable information—not failure. Avoid insisting “We must finish.” Instead:
– Validate: “It’s okay to pause. Your body is telling you it’s had enough.”
– Preserve: “Let’s save it here. We can revisit tomorrow if you wish.”
– Reflect later: “What part felt tricky? What might make it more fun next time?”
Choosing to stop builds self-awareness. Forcing completion teaches that adult agendas outweigh their internal cues—a lesson worth avoiding. Sometimes the deepest learning is in honoring one’s limits.
Q: Are there universal safety considerations to remember?
A: Three foundational practices:
1. Choking awareness: For children under 3, use items larger than a toilet paper tube. When uncertain, use the tube test—if it fits inside, it’s unsafe.
2. Non-toxic materials: Assume mouthing for toddlers. Choose food-based paints (yogurt + food coloring), washable glue. Avoid small magnets or button batteries entirely.
3. Tool supervision: Scissors, hole punches, and blenders require direct adult handling for young children. Frame positively: “My job is safety; your job is designing!”
When safety feels overwhelming, begin with Activities 1, 12, or 14—they emphasize observation with minimal tools.
Q: How can I connect activities to my child’s school learning?
A: Bridge gently without pressure:
– Math: While making seed paper pulp (Activity 7), note: “We need half a cup—show me that line.”
– Literacy: After shadow puppets (Activity 8), write the story together. Notice capital letters for names.
– Science: Ice excavation (Activity 6) explores states of matter. A photo of the melting process can spark classroom conversation.
Avoid quizzing. Instead, narrate: “You’re using such descriptive words for your puppet—that’s what authors do!” Teachers often value authentic home connections more than forced worksheets.
Q: What if I don’t have the suggested materials?
A: The Pantry Swap and Minimal versions exist for this reason! DIY thrives on substitution. No cardboard tubes? Roll paper. No seeds? Press flower petals into paper pulp. The core learning lives in the process, not the materials. Ask your child: “What could we use instead?” This models resourcefulness and turns limitation into collaborative problem-solving. Some of the most meaningful projects emerge from creative constraint.
Q: How do I encourage a child who says “I’m bored” with hands-on activities?
A: “Boredom” often signals overwhelm, uncertainty, or lack of ownership. Try:
– Reduce choice: “Today we have two options: marble path or nature rubbings. Which calls to you?”
– Increase autonomy: “You choose the colors. You decide where to tape first.”
– Connect to passion: Love trucks? Build a cardboard garage (Activity 2 variation). Obsessed with unicorns? Create a rainbow sensory bottle (Activity 1).
– Join briefly: Sit beside them for 5 minutes. “Show me your idea.” Your focused attention often reignites engagement. Then step back: “I’ll be nearby if you need me.”
Q: Can these activities replace screen time entirely?
A: Balance, not elimination, supports well-being. The American Academy of Pediatrics suggests co-viewing quality content and prioritizing interactive over passive screen use. Frame DIY activities as intentional alternatives, not punishments: “After 20 minutes of tablet time, let’s build that marble path!” Connect screens and hands-on play: “We watched a video about volcanoes—now let’s make one!” This reduces power struggles while gradually shifting the activity balance toward tactile engagement.
Q: How do I document learning without making it feel like a test?
A: Keep documentation joyful and child-centered:
– Photo snippets: Capture hands working, not just final products. Print one monthly; let your child arrange in a scrapbook.
– Voice notes: Record them explaining their creation: “Tell me about your tower.” Play it back later—they’ll delight in hearing themselves.
– Growth walls: Keep the Family Growth Record (Activity 15) visible. Note progress casually: “Remember when your handprint was this small?”
Never use documentation for comparison. Focus on personal growth: “You tried three ways to fix that wobbly tower—what did you learn?”
Q: What distinguishes meaningful engagement from busywork?
A: Look for these signs of authentic learning:
✅ Child extends the idea: “Can we make another with different colors?”
✅ Verbal processing: “If I make the ramp steeper, the roller will go faster!”
✅ Emotional investment: Pride in sharing, gentle disappointment when interrupted (healthy engagement)
✅ Transfer: Using weaving patterns (Activity 10) while braiding hair later
Busywork feels like checking a box. Meaningful engagement feels like curiosity unfolding. Trust your observation over curated images.
Q: How can I involve my child in planning?
A: Age-appropriate involvement builds investment:
– Ages 2–4: Offer binary choices: “Red paint or blue?” “Inside or outside?”
– Ages 5–7: Show 2–3 activity images: “Which looks most fun to try?”
– Ages 8+: Browse options together. “What problem shall we explore this week? A wobbly tower? A slow roller?”
– All ages: After an activity, ask: “What should we keep the same next time? What should we change?”
This cultivates agency—the understanding that their voice matters. It also offers priceless insight into their evolving interests.
Q: Are adaptations possible for children with diverse needs?
A: Absolutely. Adaptation honors individuality:
– Sensory sensitivities: Offer gloves for messy play; noise-reducing headphones for crinkly tasks; begin with dry sensory bins.
– Fine motor considerations: Use adaptive tools (spring-loaded scissors, chunky crayons); emphasize process over precision (“Squishing the clay is the fun part!”).
– Attention differences: Break into micro-steps with clear endpoints (“First we tape this tube. Then we test.”). Use visual timers.
– Communication needs: Pair with visual schedules or AAC devices. Focus on nonverbal expression (pointing, gestures).
Consult occupational or speech therapists for personalized strategies. The core principle remains: follow your child’s lead, honor their pace, and celebrate effort.
Q: How often should we do these activities?
A: Consistency outweighs frequency. One meaningful 20-minute session weekly holds more value than forced daily sessions that drain everyone. Notice natural openings:
– Weekend mornings: When energy feels high
– After school: As a gentle transition ritual
– Rainy afternoons: As intentional alternatives to screens
Most importantly, protect unstructured play time. Children need ample space to initiate their own projects—this is where deepest creativity flourishes. Your role isn’t to constantly provide activities, but to cultivate an environment where curiosity feels safe to emerge.
Conclusion: Growing a Home Where Curiosity Feels Welcome
We began by moving beyond false choices: the pressure of perfection versus passive consumption. What remains is simpler and more profound—the understanding that learning lives in ordinary moments shared with children. It’s in the careful pour of baking soda that fizzes with vinegar, the quiet focus of placing a leaf into a weaving, the shared laughter when a marble path collapses yet again. These fifteen activities are not prescriptions. They are invitations—to observe your child more deeply, to trust the learning process even when it’s messy, and to rediscover wonder alongside them.
Three Anchors for Intentional Engagement
1. Framework Over Formula: The Learning Layers approach (Foundation, Exploration, Extension) offers flexible support without demanding perfection.
2. Child-Led Adaptation: Use decision guides and substitutions to align activities with your child’s unique rhythm and your family’s reality.
3. Friction-Reducing Practices: Embrace micro-moments, tiered roles for siblings, and “functional reset” to sustain engagement without burnout.
The 24-Hour Invitation: Within the next day, take one small, specific action. Not “do more activities.” Instead: Observe your child during unstructured play for exactly ten minutes. Notice without interrupting. What material draws their attention? What question repeats? What problem are they quietly solving? Jot it down. Tomorrow, choose one activity from this guide that gently connects to that observation. That single act of responsive attention—seeing your child’s curiosity and meeting it—is more powerful than any perfectly executed project.
A Wider View: You are not merely crafting or experimenting. You are nurturing a foundation of trust where curiosity feels safe, mistakes are learning steps, and joy lives in the doing. You are modeling that questions matter, persistence has quiet value, and connection deepens through shared presence. These moments accumulate gently, like layers of soil, forming the bedrock of a confident, curious human. Years from now, your child may not recall the exact shade of blue in their sensory bottle or the number of tubes in their marble path. But they will carry the quiet certainty that their curiosity was seen, honored, and met with patience. That is the true catalyst—the enduring knowledge that they are capable, creative, and deeply loved.
Explore Our Thoughtful Resources:
The Calm Connection: Low-Prep Learning Stations for Busy Days | Sensory Play Simplified: Gentle Ideas for Young Children | Home Learning Spaces: Organizing for Curiosity, Not Clutter | Resourceful Making: 30 Activities Using Household Items | Nurturing Thinkers: Open-Ended Questions for Everyday Moments | The Listening Parent: Strengthening Bonds Through Play | Beyond Praise: Encouraging Words That Build Inner Confidence