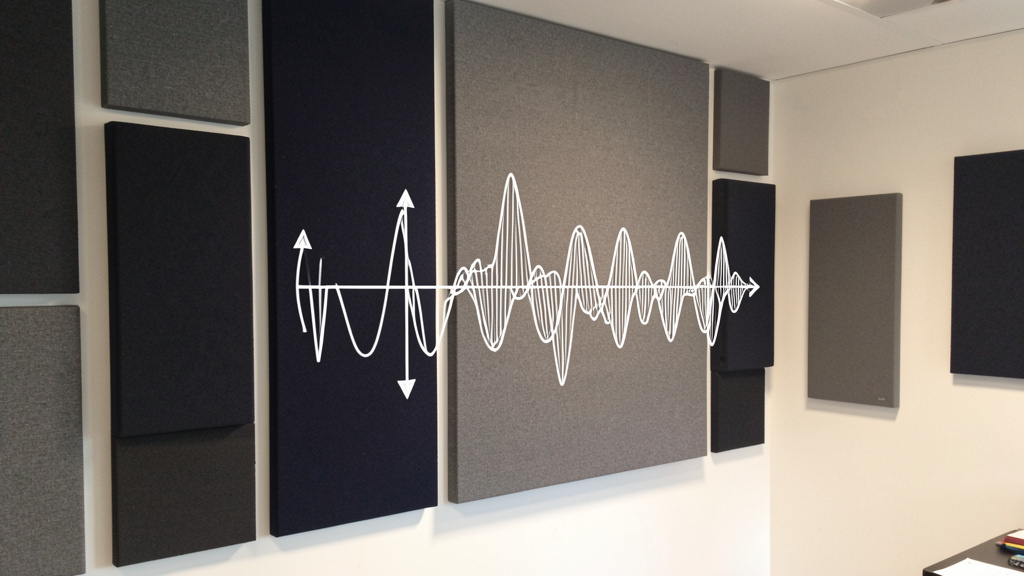
Transform Echoes into Ambiance—Practical, Adaptable Strategies to Tame Reverberation, Reduce Noise, and Create a Space That Sounds as Good as It Looks
That moment when you lean forward to catch dialogue during a movie. The frustration of raising your voice during conversation while background music plays softly. The hollow “ping” of footsteps echoing across hardwood floors. These aren’t just minor annoyances—they’re symptoms of an acoustically unbalanced living room. You’ve carefully selected furniture, curated lighting, and chosen colors that reflect your style, yet the sound of your space remains overlooked. This comprehensive guide bridges that gap. We’ll translate acoustic science into actionable, room-by-room strategies—using solutions that respect your budget, rental restrictions, design aesthetic, and daily reality. No engineering degree required. Just clear steps to transform how your living room feels through the power of intentional sound management.
Introduction: Why Your Living Room’s Sound Matters More Than You Think
Close your eyes for a moment. Imagine two identical living rooms: same sofa, same art, same lighting. In Room A, voices carry clearly across the space. Laughter feels warm and present. Music wraps around you without harsh edges. In Room B, every word requires effort to decipher. Footsteps clatter. The TV competes with its own echo. Which room invites connection? Which feels like a sanctuary? Acoustic comfort isn’t a luxury reserved for recording studios or luxury theaters—it’s a foundational element of livable design. Environmental psychology research consistently associates well-managed sound environments with reduced stress, improved concentration, deeper social engagement, and better rest in adjacent spaces. Yet most home design resources treat acoustics as an afterthought, if at all.
This disconnect often persists because acoustic challenges are invisible. You can see a cluttered shelf or feel an uncomfortable chair, but reverberation—the persistence of sound after its source stops—is sensed only through its effects: fatigue after conversation, strained ears during movie night, or the subtle tension of feeling “on edge” without knowing why. Drawing on established principles of architectural acoustics and patterns observed across diverse residential settings—from historic apartments to modern open-concept homes—this guide reframes sound control not as technical tinkering, but as intentional environmental design. Whether you live in a sun-drenched loft with concrete floors, a cozy cottage with low ceilings, or a modern open-plan home where kitchen noise drifts into your relaxation zone, the solutions here are adaptable, scalable, and deeply human-centered. Your journey to acoustic comfort begins not with expensive gear, but with understanding how sound moves through your space—and how small, strategic interventions create profound shifts in daily experience.
The 3-Layer Acoustic Comfort Framework: A Systematic Approach to Sound Control
Forget fragmented tips like “add a rug” or “hang panels.” Achieving acoustic comfort often benefits from a holistic strategy. Patterns observed across numerous residential scenarios reveal that effective solutions address three distinct—but interconnected—layers of sound behavior. This framework, adapted from professional acoustic methodology used in multipurpose community spaces and refined for everyday living rooms, provides a clear mental model. Think of it as cultivating a sonic ecosystem where each layer supports the others. Neglecting one layer may lead to imbalance: too much absorption can feel cave-like; diffusion without sufficient absorption may scatter harsh echoes; isolation efforts without internal treatment leave you contending with internal reflections. By thoughtfully applying all three layers, you can cultivate a space where sound works in your favor—not the other way around.
Layer 1: Absorption — Softening Harsh Reflections
Absorption forms your foundational layer. It addresses the most common living room acoustic challenge: excessive reverberation. When sound waves strike hard surfaces (bare walls, windows, hardwood floors, glass tables), they bounce back into the room. In spaces with many parallel hard surfaces—a hallmark of modern minimalist design—these reflections multiply, creating a chaotic sonic environment where speech clarity suffers and music loses definition. Absorption materials gently convert sound energy into minimal heat, reducing the intensity and duration of these reflections. The goal isn’t silence; it’s clarity. A well-absorbed room feels calm, intimate, and effortless for conversation.
Why Absorption Is Your First Line of Defense
Consider a raindrop hitting a pond. One drop creates gentle ripples that fade quickly. Now imagine many drops hitting simultaneously—the water becomes chaotic, obscuring individual patterns. Sound in a reflective room behaves similarly. Each word, footstep, or note generates sonic “ripples” that collide and muddy the primary signal. Absorption acts like a sponge for these ripples. Crucially, absorption targets mid and high frequencies first—the range where human speech lives (approximately 500 Hz to 4,000 Hz). This is why adding absorption often yields the most immediate improvement in dialogue intelligibility. Low frequencies (bass) require thicker, denser treatment—a nuance addressed later—but starting with mid/high absorption addresses the majority of common living room acoustic challenges. Without this layer, diffusion and isolation efforts may struggle against a chaotic sonic backdrop.
Identifying Your Room’s Critical Absorption Zones
Not all surfaces demand equal attention. Strategic placement maximizes impact with minimal materials. Use this diagnostic sequence:
1. The Clap Test: Stand where you typically sit (sofa position). Have a helper stand near the TV or primary sound source. Clap sharply once. Listen carefully. Do you hear a distinct “slap” echo? A lingering “wash” of sound that feels too long? Or does the sound stop cleanly? Repeat near large windows, opposite bare walls, and under high ceilings. Note where echoes are strongest—these are your priority zones.
2. First Reflection Points: Imagine a laser beam shooting from your speaker (or TV) toward the side walls. Where would it hit? That spot—and its mirror point on the opposite wall—is a critical reflection zone. Place a mirror flat against the side wall. Sit in your listening position. Have someone slide the mirror along the wall. Where you see the speaker reflected is a first reflection point. Treat these spots first—they have the greatest impact on perceived sound clarity.
3. The Ceiling Factor: Often overlooked! In rooms with higher ceilings, sound bounces powerfully downward. If your clap test reveals a “hollow” quality overhead, ceiling treatment becomes essential.
4. Floor Realities: Hard floors (wood, tile, concrete) are major reflectors. Area rugs aren’t just decorative—they’re functional acoustic tools. Prioritize rugs under seating areas and high-traffic paths.
Materials Deep Dive: Performance, Practicality, and Aesthetics
Not all soft materials absorb sound equally. Effectiveness is commonly referenced using the Noise Reduction Coefficient (NRC), a scale from 0 (perfect reflector) to 1.0 (perfect absorber). Understanding typical NRC ranges helps avoid wasted effort.
| Material Type | Typical NRC Range | Best For | Key Considerations |
|---|---|---|---|
| Thick Wool/Area Rug (with pad) | 0.3 – 0.6 | Floor reflections, warmth | Pad is critical! Rubber or felt pads significantly boost performance. Size matters—cover 60-70% of seating area. |
| Heavy Velvet/Cotton Curtains (floor-length, pleated) | 0.4 – 0.6 | Windows, large bare walls | Must be full (approximately 2.5x window width) and hung close to wall. Open-weave sheers offer minimal absorption. |
| Standard Acoustic Foam Panels | 0.6 – 0.8 | First reflection points | Avoid cheap egg-crate foam (fire hazard, poor performance). Look for Class A fire-rated foam. |
| Fabric-Wrapped Fiberglass Panels (2″ thick) | 0.8 – 1.1+ | Walls, ceilings, maximum impact | Widely regarded for performance. Fiberglass core wrapped in acoustically transparent fabric. |
| Bookshelves (filled with books of varying depths) | 0.3 – 0.5 | Diffusion + light absorption | Irregular surfaces break up sound. Avoid empty shelves or uniform book sizes. |
| Upholstered Furniture (sofas, armchairs) | 0.2 – 0.5 | General room damping | Sectionals with deep cushions generally outperform tight-back chairs. Leather reflects more than fabric. |
| Acoustic Ceiling Tiles/Clouds | 0.7 – 1.0 | High ceilings, echo control | Suspended clouds target ceiling reflections without full ceiling replacement. |
Budget-Friendly Absorption Hacks That Actually Work:
* The Blanket Fort Principle (Elevated): Drape thick, textured blankets (wool, faux fur) over the back of a sofa facing a reflective wall. Not permanent, but instantly testable. A folded moving blanket tucked behind the TV stand absorbs rear-wall reflections.
* Towel Power: Roll up thick bath towels and place them vertically along the base of a large window during focused listening sessions. Surprisingly effective for temporary high-frequency absorption.
* Pillow Power: Cluster decorative pillows with dense inserts (down alternative > polyester fiberfill) on your sofa. More surface area = more absorption. Rotate them periodically to maintain loft.
* DIY Panel Lite: Stretch burlap or heavy canvas over a simple wooden frame stuffed with recycled denim insulation. Secure tightly. Hang as art. Performance approaches commercial panels with proper density.
Critical Balance to Maintain: Avoiding Over-Absorption
Creating a “dead” room is as problematic as an echoey one. Symptoms include muffled speech, loss of musical liveliness, and a sense of confinement. This typically happens when only absorption is used extensively on all walls and ceiling. The remedy? Balance. Start with targeted absorption at first reflection points and the floor. Add only after testing. A room should feel “clear,” not “quiet.” If conversation feels unnaturally hushed or music lacks energy, you’ve likely absorbed too much. Introduce diffusion (Layer 2) to restore natural liveliness without reintroducing harsh echoes.
Layer 2: Diffusion — Scattering Sound for Natural Clarity
Once harsh reflections are tamed with absorption, diffusion refines the sonic experience. While absorption reduces sound energy, diffusion redistributes it. Imagine light hitting a frosted glass bulb versus a bare bulb. The bare bulb creates harsh glare and sharp shadows; the frosted bulb scatters light evenly, illuminating the room softly and completely. Diffusion does the same for sound. It breaks up strong, focused reflections into many smaller, weaker reflections arriving at your ears at slightly different times. The result? A more spacious, enveloping, and natural sound field where music gains dimensionality, voices feel present without strain, and the room itself seems larger and more comfortable.
The Science of Diffusion Made Simple
Diffusers work through geometric complexity. A flat wall reflects sound like a mirror reflects light—a single, strong beam. A diffuser’s uneven surface (peaks, valleys, wells) scatters that beam in multiple directions. Crucially, diffusion preserves acoustic energy within the room while eliminating problematic echoes. This maintains a sense of “liveness” and spatial cues that absorption alone removes. In living rooms, diffusion is particularly valuable on rear walls (behind seating) and side walls beyond the first reflection points. It prevents the “tunnel effect” where sound feels like it’s coming only from the front speakers, creating a more immersive experience for movies and music without requiring complex surround sound systems.
Where Diffusion Delivers Maximum Impact
- The Rear Wall (Behind Seating): This is diffusion’s prime location. Strong reflections bouncing off the wall behind your sofa can muddy dialogue and create sonic “pressure.” A diffuser here scatters those reflections, enhancing clarity and perceived space.
- Side Walls (Beyond First Reflection Points): After treating first reflection points with absorption, the remaining side wall area benefits from diffusion to create a wider, more stable “sweet spot” for listening.
- Ceiling (Especially Vaulted or Sloped): Strategic diffusion on ceilings can eliminate flutter echo (a rapid “pinging” between parallel surfaces) and create a more open overhead sound field.
- Avoid Diffusing Front Walls: The wall containing your TV/speakers should generally remain absorptive or neutral. Diffusing sound at the source can blur imaging and reduce dialogue clarity.
Practical Diffusion Solutions for Real Living Rooms
You don’t need laboratory-grade quadratic residue diffusers. Effective diffusion integrates seamlessly with home life.
- The Bookshelf Solution (Most Accessible): A deep bookshelf (12+ inches / 30+ cm) filled irregularly with books of varying heights, widths, and depths is a superb natural diffuser. Avoid uniform rows. Mix in decorative objects, plants in pots, and framed photos. The key is randomness—create a topographically complex surface. Place this on the rear wall behind your main seating area. Note: Empty shelves or shelves with uniform items act more like reflectors.
- Architectural Elements: Built-in shelving with staggered depths, textured plaster walls (like Venetian plaster with subtle ridges), or a carefully arranged gallery wall with frames of varying depths provide gentle diffusion. Wainscoting with raised panels offers mild diffusion compared to flat drywall.
- Commercial Diffusers (When Aesthetics Allow): Modern diffusers are designed as art. Options include:
- Skyline Diffusers: Sleek, wave-like profiles in wood or composite. Mount horizontally on rear walls.
- Polycylindrical Diffusers: Curved wooden elements that scatter sound broadly. Often used in pairs.
- Art Diffusers: Companies now print high-resolution artwork directly onto diffusion substrates. A landscape photo or abstract pattern becomes functional art. Verify the substrate is acoustically active.
- DIY Wood Diffuser (Intermediate Project): Using publicly available plans for a “skyline” or “primitive root” diffuser, cut varying heights of wood strips and mount them vertically on a backing board with precise spacing. Sand smooth, finish to match decor. Mount securely to wall studs. This project yields professional results and becomes a conversation piece.
The Absorption-Diffusion Balance: Finding Your Room’s Sweet Spot
There is no universal ratio. The ideal balance depends on your room’s size, existing surfaces, and primary use. Use this decision flow:
1. Start with Absorption: Implement Layer 1 solutions thoroughly (rugs, curtains, first reflection panels).
2. Test the “Dead Room” Threshold: Sit in your main spot. Clap once. Does the sound stop too abruptly? Does music sound flat or distant? If yes, you likely need diffusion.
3. Add Diffusion Gradually: Begin with one significant diffuser element—like a well-filled bookshelf on the rear wall. Re-test with clap and speech.
4. Listen for the Shift: Successful diffusion often creates these sensations:
* Voices sound more “present” and less “in your head.”
* Music has greater width and depth; instrument locations become clearer.
* The room feels subjectively larger and more comfortable for extended periods.
* No harsh echoes remain, but the space doesn’t feel muffled.
If adding diffusion reintroduces noticeable echo, you likely removed too little absorption initially. Return to Layer 1 and add targeted absorption at the echo source. This iterative process—absorb, test, diffuse, test—is the heart of mastering your room’s acoustics. Patience here yields transformative results.
Layer 3: Isolation — Keeping Unwanted Sound In or Out
Isolation addresses sound transmission—preventing noise from entering your living room (traffic, neighbors, HVAC) or escaping it (TV volume disturbing others). Crucially, isolation is distinct from absorption and diffusion, which manage sound within the room. You can have a perfectly treated room internally, but if street noise penetrates easily, comfort is compromised. Isolation targets the building envelope: walls, windows, doors, and floors/ceilings. It’s often the most challenging layer due to structural constraints, but even modest improvements yield significant comfort gains. Focus efforts where sound leaks are most prevalent—typically windows and doors. Note: During seasons when windows are frequently open, temporary solutions like acoustic curtains can be particularly useful for managing noise during specific times of day, while permanent sealing efforts provide year-round benefits.
Understanding Sound Transmission Paths
Sound travels via two primary paths:
* Airborne Noise: Voices, TV dialogue, traffic rumble, barking dogs. Travels through air gaps and vibrates lightweight structures. Addressed by mass, sealing gaps, and decoupling.
* Structure-Borne Noise: Footsteps from above, vibrating appliances, slamming doors. Travels through solid materials (joists, studs, concrete). Addressed by damping, decoupling, and adding resilient layers.
Most living room isolation challenges involve airborne noise. While technical metrics like Sound Transmission Class (STC) exist, practical improvements focus on sealing leaks and adding mass where feasible. Standard construction offers limited isolation; targeted upgrades make a measurable difference.
High-Impact, Low-Cost Isolation Upgrades
-
Windows: The Weakest Link (and Easiest Win):
- Weatherstripping: Replace cracked or missing seals around operable windows. V-strip (tension seal) or foam tape applied to the sash stops air (and sound) leaks. Cost: $10-$30 per window. Impact: High for high-frequency noise (voices, birds).
- Acoustic Curtains: True acoustic curtains have multiple dense layers (often including a mass-loaded vinyl core) and extend beyond the window frame on all sides, sealing tightly against walls. Look for products with published STC ratings. Close them during noisy periods. Aesthetic tip: Choose neutral colors (charcoal, navy, oat) that complement decor; hang on sturdy tracks for full coverage.
- Window Plugs (Renter-Friendly): Build a simple frame from rigid insulation board cut slightly larger than the window opening. Wrap tightly in fabric. Insert snugly into the window recess during focused sessions. Remove and store easily. Adds significant mass without permanent changes.
- Secondary Glazing: Install a clear acrylic or glass panel inside the existing window frame, creating an air gap. Kits like Indow Windows use compression tubing for a near-invisible, removable fit. Significantly reduces noise and improves insulation. Ideal for historic homes or rentals where window replacement isn’t allowed.
-
Doors: Sealing the Gap:
- Door Sweep: The #1 upgrade. A brush or rubber sweep attached to the bottom of the door seals the largest gap. Choose an automatic drop-down sweep for a tighter seal when closed. Cost: $15-$50.
- Perimeter Seals: Apply adhesive-backed foam tape or vinyl tubing around the door frame where the door meets the jamb. Ensure the door closes smoothly against the seal.
- Solid Core Door Replacement: If feasible, replace a hollow-core interior door (minimal isolation) with a solid-core door. For exterior doors, prioritize quality weatherstripping first; full replacement is costly but highly effective.
-
Walls and Floors (Targeted Approaches):
- Mass-Loaded Vinyl (MLV): A flexible, dense sheeting added under drywall, under flooring, or even over existing walls (covered by fabric or paneling). Adds significant mass to block sound transmission. Best installed during renovations, but can be used creatively (e.g., hung behind a large tapestry on a shared wall).
- Resilient Channels: Metal channels that decouple drywall from studs, preventing vibration transfer. Strictly a construction-phase solution, but worth noting if planning a remodel.
- Rugs with Thick Pads: While primarily absorptive (Layer 1), a dense rug + thick rubber/felt pad significantly reduces impact noise (footsteps) traveling to rooms below—critical in apartments or multi-level homes. Look for pads specifically rated for sound dampening.
When Isolation Requires Professional Assessment
If noise intrusion is severe (e.g., living near consistent high-volume sources), or if you need significant sound containment (e.g., home theater at high volumes), consult a qualified acoustic consultant. They can identify precise leakage points and recommend engineered solutions. While investment is higher, the return in peace of mind can be substantial. Prioritize based on your specific pain points—don’t over-engineer for minor issues.
The Fundamental Principle: Effective acoustic design isn’t about eliminating all sound—it’s about managing reflections, controlling reverberation, and creating a balanced sonic environment where speech is clear, music is enjoyable, and ambient noise feels intentional. Comfort emerges from harmony between the three layers, not the dominance of any single one.
Tailoring Solutions to Your Living Situation: Renters, Homeowners, Budgets, and Aesthetics
Acoustic principles are universal, but implementation must respect your reality. A solution requiring drilling into historic plaster fails a renter. A $5,000 panel system isn’t feasible for every budget. True mastery lies in adapting the framework to constraints. Below, we translate core strategies into actionable paths for distinct scenarios.
For Renters: Non-Permanent, Landlord-Friendly Acoustic Upgrades
Your power lies in reversibility and surface-level solutions. Focus on Layers 1 and 3 with removable elements.
* Absorption (Layer 1):
* Rugs & Pads: Your most powerful tool. Use non-slip rug pads that won’t damage floors. Roll up and take with you.
* Tension Rod Curtains: Install heavy curtains using tension rods inside the window frame—no drilling required. Extend rods beyond frame width for better coverage.
* Removable Panel Systems: Some panels use removable adhesive hooks (like high-strength Command Strips rated for the panel weight) or freestanding stands. Always test adhesion on a hidden spot first and get landlord approval in writing for any adhesive use.
* Furniture Strategy: Position large upholstered furniture (sofa, armchair) against the noisiest wall (e.g., shared wall with neighbors). Bookshelves filled with books act as absorbers/diffusers and are easily movable.
* Isolation (Layer 3):
* Temporary Window Plugs: As described earlier—rigid insulation board wrapped in fabric. Store in a closet when not needed.
* Draft Dodgers: Fabric tubes filled with sand or rice placed along the bottom of doors/windows block air and sound leaks. Easily removable.
* Door Sweeps with Temporary Mounts: Some sweeps clamp onto the door bottom without screws. Verify with landlord.
* Critical Rule: Document the room’s condition before moving in. Photograph walls, floors, windows. This protects you when implementing even minor changes. Always prioritize solutions that leave zero residue or damage upon removal.
For Homeowners: Permanent Upgrades Worth the Investment
You have the freedom to integrate acoustics into the home’s structure. Plan upgrades around renovation cycles for maximum impact and value.
* During Renovations:
* Walls: When opening walls (e.g., for electrical), add dense insulation (mineral wool is often preferred for sound dampening). Consider resilient channels before new drywall. Damping compounds between drywall layers can further reduce transmission.
* Floors: Under hardwood or laminate, install an acoustic underlayment (cork, rubber, or specialized foam). For carpet, specify a thick, dense pad rated for sound absorption.
* Ceilings: In open-plan homes, consider adding acoustic clouds or baffles suspended below the main ceiling to define the living area acoustically without full enclosure.
* Strategic Permanent Additions:
* Built-In Bookshelves: Design deep, irregular-depth shelves on problematic walls (rear wall, side walls). Function as diffusion and storage.
* Acoustic Wall Panels as Feature Wall: Work with a carpenter to build a grid of fabric-wrapped panels. Choose fabric to match your color scheme—this becomes intentional design.
* Window Replacement: When budget allows, replace single-pane windows with dual-pane laminated glass units. Laminated glass (with a PVB interlayer) blocks significantly more noise than standard dual-pane. Prioritize windows facing noise sources.
* Long-Term Value: These upgrades enhance not just daily comfort but also property appeal. Discerning buyers increasingly value “quiet homes,” especially in urban areas. Document acoustic improvements for future disclosures.
Budget Tiers: Acoustic Comfort at Every Price Point
Progress is possible at any budget. Prioritize based on your most acute pain point.
| Budget Tier | Primary Focus | Key Actions | Estimated Cost Range | Expected Impact |
|---|---|---|---|---|
| Under $100 (Starter Kit) | Targeted Absorption | 1 large thick rug + pad; Heavy curtains for main window; DIY blanket test behind sofa | $50 – $100 | High for echo reduction; immediate improvement in speech clarity |
| $100 – $500 (Strategic Upgrade) | Layer 1 Completion + Layer 3 Start | Add 2-4 fabric-wrapped panels at first reflection points; Upgrade door sweep; Acoustic curtain for problematic door/window | $150 – $450 | Significant reduction in reverberation; noticeable decrease in external noise intrusion |
| $500 – $1,500 (Comprehensive Comfort) | Full Layer 1 + Layer 2 Integration | Professional panels for reflection points + rear wall diffuser (bookshelf or art diffuser); Secondary glazing for main window; Thick rug system throughout seating area | $600 – $1,400 | Transformative clarity; immersive sound field; major noise reduction; room feels intentionally designed |
| $1,500+ (Premium Integration) | All Layers + Aesthetic Fusion | Custom-built acoustic feature wall; Full window secondary glazing or replacement; Ceiling clouds; Professional consultation for problem areas | $1,500+ | Studio-grade clarity within living space; near-complete noise isolation; seamless integration with high-end design |
Prioritization Flowchart for Limited Funds:
1. Is echo/reverberation your main issue? → Start with rug + pad. Test. If echo persists, add heavy curtains. Test. Then add 2 absorption panels at first reflection points.
2. Is outside noise your main issue? → Start with door sweep + weatherstripping. Test. Then add acoustic curtains for main window. Test. Then consider window plug or secondary glazing.
3. Is TV dialogue hard to hear? → Start with absorption behind seating area (rug, panel on rear wall) to reduce reflections muddying the sound. Test. Then ensure speakers/TV are at ear level.
Aesthetic Integration: Making Acoustic Treatments a Design Feature
The biggest barrier isn’t cost or complexity—it’s the fear that acoustic solutions will clash with your style. This is a solvable design challenge. The key is intentionality: treatments should look chosen, not added.
- Color and Texture Strategy:
- Monochromatic Harmony: Choose panel fabric in a shade identical to your wall color. From a distance, panels disappear; up close, texture adds depth. Works beautifully in minimalist, modern, or Scandinavian interiors.
- Accent Integration: Select fabric that pulls a secondary color from your rug, artwork, or throw pillows. Panels become coordinated design elements.
- Textural Contrast: In a room with smooth surfaces (leather sofa, glass table), use panels with heavy weave (burlap, linen, bouclé) to add tactile warmth. In a rustic room, reclaimed wood diffusers complement the aesthetic.
- Art as Acoustics:
- Commission local artists to create work on acoustically transparent canvas stretched over absorption panels. You support art and solve a problem.
- Print high-resolution personal photos (family travels, nature shots) onto acoustically transparent fabric. A gallery wall of meaningful images that also functions acoustically.
- Use modular panel systems where each panel is a different fabric swatch from your favorite designers—creates a dynamic, curated look.
- Furniture-Centric Solutions:
- Sofa Strategy: Choose deep-seated sofas with high, padded backs. Position so the back faces a reflective wall—the sofa itself becomes absorption.
- Ottoman Power: A large, upholstered ottoman in the center of the room absorbs floor reflections and adds seating. Choose one with storage to maximize utility.
- Plant Power: Large leafy plants (fiddle leaf fig, bird of paradise) in thick soil-filled pots add mild absorption and diffusion. Group several together on a reflective corner for visual and acoustic benefit. (Note: Plants alone won’t solve major issues, but they contribute positively to the ecosystem.)
- Case Study: Modern Farmhouse Living Room
- Challenge: Open-plan space with vaulted shiplap ceiling, hardwood floors, large windows. Echoey, TV dialogue unclear, kitchen noise carries.
- Solution:
- Layer 1: Jute area rug with thick felt pad under seating group; Floor-to-ceiling linen curtains on windows; Two panels wrapped in oat-colored bouclé fabric at first reflection points (mounted discreetly beside window frames).
- Layer 2: Deep built-in bookshelf on rear wall filled with books, woven baskets, and ceramic vases—acts as diffuser and storage. Shiplap ceiling texture provides mild natural diffusion.
- Layer 3: Solid-core door added between living and kitchen areas with automatic door sweep; Acoustic curtain installed on door for extra quiet during movie nights.
- Result: Echo eliminated. Speech clarity dramatically improved. Kitchen noise contained. Treatments feel inherent to the “collected,” textured aesthetic of the home—no one guesses their acoustic purpose unless told.
Solving Specific Acoustic Problems: Targeted Protocols
Generic advice fails when faced with a specific frustration. Below are precise, step-by-step protocols for the four most common living room acoustic complaints. Follow the sequence exactly—each step builds on the previous one.
Problem 1: The “Echo Chamber” Effect (Excessive Reverberation)
Symptoms: Voices sound hollow or distant; footsteps/clattering dishes create noticeable “ping”; music lacks definition; you feel tired after socializing in the room.
1. Diagnose: Perform the clap test. Stand in center of room. Sharp clap. Listen for distinct repeat echoes (slap echo) or a sustained wash of sound that lingers noticeably.
2. Immediate Action (Layer 1 – Absorption):
* Place the largest, thickest rug you can afford (with dense pad) under the main seating area. Ensure it extends 12+ inches beyond sofa feet.
* Hang heavy, floor-length curtains on all windows. Close them fully during testing.
* Add two absorption panels (24″x48″ minimum) at the first reflection points on side walls (use mirror method to locate).
3. Re-Test: Repeat clap test. Is reverb reduced? Is speech clearer? If yes, but echo persists:
4. Secondary Action:
* Add absorption to the ceiling: Install one or two suspended acoustic clouds centered over the seating area, hung 12-18 inches below ceiling.
* Place a large upholstered ottoman or footstool in the center of the room.
* Fill a bookshelf on the rear wall with books and objects (adds absorption + diffusion).
5. Final Check:* Re-test clap and speech. If reverb is now comfortable, stop. If room feels “dead,” proceed to Layer 2: Add a diffuser (like the filled bookshelf) on the rear wall to restore natural liveliness without reintroducing echo.
Problem 2: Muddy Bass and Boomy Low Frequencies
Symptoms: Movie explosions feel overwhelming; music lacks punch; certain notes cause windows/rattling; bass sounds uneven (loud in one seat, weak in another).
Low frequencies (below 250 Hz) are long wavelengths that build up in room corners—a phenomenon called “room modes.” Standard thin panels won’t absorb them effectively. Targeted treatment is required.
1. Diagnose: Play content with consistent low-end. Walk slowly around the room perimeter, especially corners. Note where bass feels strongest (“pressure points”) or weakest (“nulls”). Corners are almost always problem zones.
2. Immediate Action (Bass Traps):
* Corner Traps: Place broadband bass traps in the front two vertical corners (where side walls meet front wall behind TV/speakers). These are thick (4″+), dense panels shaped to fit corners. They absorb low-mid and low frequencies.
* Ceiling-Wall Corners: If possible, add traps where side walls meet the ceiling in the front corners. This addresses vertical modes.
* Rear Corners: Add traps to the two rear vertical corners (behind seating) if front traps don’t resolve the issue. Start with front corners first—they have the greatest impact on the listening position.
3. Furniture Placement Tweaks:
* Avoid placing the main sofa flush against the rear wall. Pull it out 6-12 inches. This reduces bass buildup at the listening position.
* If using a subwoofer, employ the “subwoofer crawl”: Place subwoofer in your main listening seat. Crawl around the room perimeter (especially front corners and mid-wall points). Where the bass sounds fullest and smoothest, that’s the optimal subwoofer location. Move sub there.
4. Re-Test: Play the same content. Is the boominess reduced? Is bass more even across seats? Are rattles eliminated? If boomy spots remain, add traps to the next most problematic corners. Note:* Complete elimination of all room modes is generally not achievable in residential spaces; the goal is significant reduction to enjoyable levels.
Problem 3: Outside Noise Intrusion (Traffic, Neighbors, Street Life)
Symptoms: Constant awareness of street noise; conversations from adjacent units are audible; difficulty relaxing; TV volume must be raised to compensate.
Focus shifts heavily to Layer 3 (Isolation), with Layer 1 supporting internally.
1. Identify the Leak: On a noisy day, walk slowly around the room perimeter. Hold a lit candle or incense stick near windows, doors, electrical outlets on exterior walls, and baseboards. Watch for flame/smoke movement indicating air (sound) leaks. Note the loudest intrusion points.
2. Seal Air Gaps (Highest ROI):
* Windows: Apply high-quality V-strip weatherstripping to operable sashes. Replace cracked rubber gaskets.
* Doors: Install a high-quality automatic door sweep. Apply foam tape weatherstripping to the door stop molding.
* Outlets/Switches: On exterior walls, install foam gaskets behind cover plates (costs pennies per outlet).
3. Add Mass at Primary Leak Points:
* Windows: Install acoustic curtains with published performance ratings. Ensure they cover the entire window frame and overlap walls by 6+ inches. For severe noise, implement secondary glazing or build removable window plugs.
* Doors: If hollow-core, consider replacing with solid-core door during next renovation cycle. For now, use a draft dodger along the bottom.
* Walls: Hang a large, heavy tapestry or quilt on the noisiest exterior wall. For shared walls with neighbors, position a tall bookshelf filled with books against the wall—mass and diffusion combined.
4. Internal Damping (Layer 1 Support): Add thick rugs with pads and heavy curtains. While this doesn’t block external noise entering, it reduces the internal reverberation of the noise that does get in, making it less intrusive.
5. Supplemental Strategy: Sound Masking:* Use a white noise machine, fan, or subtle nature sounds app playing at low volume. This doesn’t reduce noise but raises the ambient sound floor, making intrusive noises less noticeable. Place the source away from seating areas.
Problem 4: TV Dialogue Hard to Hear, But Explosions Too Loud
Symptoms: Constantly adjusting volume; asking others to repeat what was said on screen; action scenes force you to lower volume, then dialogue becomes inaudible again.
This is rarely just a TV issue—it’s a room acoustics issue combined with content mastering. Modern films have wide dynamic range (quiet whispers to loud crashes). Your room’s reflections muddy the quiet parts.
1. Optimize TV/Speaker Settings FIRST:
* Enable “Dialogue Enhancement,” “Clear Voice,” or “Night Mode” in your TV/soundbar settings. These compress dynamic range and boost mid-frequencies where speech lives.
* Ensure center channel speaker (if using a soundbar or surround system) is positioned correctly—ideally at ear level when seated, not blocked by objects.
2. Address Reflections Muddying Dialogue (Layer 1):
* Critical Zone: Add absorption directly behind your main seating position. A thick rug is essential. Hang an absorption panel on the rear wall centered behind the sofa. This prevents sound from the TV bouncing off the rear wall and arriving at your ears slightly delayed, which blurs dialogue.
* Side Walls: Treat first reflection points as described earlier. This cleans up the direct sound path from TV to ears.
3. Manage Bass for Explosions (Layer 1 + Problem 2 Protocol):
* If using a subwoofer, reduce its volume level slightly in the receiver/soundbar settings. Many systems are bass-heavy by default.
* Implement bass trap protocol in front corners to control room-induced boominess.
4. Speaker Placement Check:
* Soundbar: Must be centered under TV, not tucked in a cabinet where sound reflects off surfaces. Elevate if possible.
* Bookshelf Speakers: Form an equilateral triangle with your main listening position. Tweeters should be at ear level. Avoid placing speakers in corners (exaggerates bass) or flush against walls (causes reflections).
5. Re-Test with Content: Play a scene with quiet dialogue followed by action. Is dialogue clearer at a comfortable volume? Are explosions impactful but not painful? Adjust settings incrementally. Remember: Room treatment reduces the need* for extreme volume adjustments.
Overcoming Common Frictions and Misconceptions
Even with clear steps, doubts arise. Let’s address the most persistent barriers head-on, replacing myth with evidence-based clarity.
“Acoustic Panels Will Ruin My Decor”
This is the most cited hesitation—and the most solvable. The perception stems from outdated images of stark foam wedges. Today’s solutions are design-forward:
* Fabric Choice is Key: Panels are wrapped in acoustically transparent fabric—meaning sound passes through to the absorptive core. You choose the fabric. Select from thousands of options: linen for texture, velvet for luxury, burlap for rustic charm, or even custom-printed images. Match your sofa fabric, pull a color from your artwork, or choose a neutral that blends seamlessly.
* Strategic Placement = Intentional Design: Mount panels where art naturally lives: flanking a window, centered on a large wall, or creating a symmetrical arrangement beside a fireplace. When placed with design intent, they read as curated art objects. A documented example shows a minimalist living room transformed by six panels wrapped in charcoal-gray bouclé fabric in a grid pattern on the accent wall—guests consistently compliment the “textural art installation,” unaware of its acoustic function.
* Hide in Plain Sight: Mount panels behind sheer curtains. The curtain diffuses light; the panel absorbs sound. Use panels as the backing for a floating shelf display. Integrate them into custom built-ins. The goal isn’t invisibility—it’s harmonious integration where the treatment enhances the room’s aesthetic story.
“This Seems Too Complicated for a Non-Expert”
Acoustics has jargon, but the actions are straightforward. You don’t need to calculate technical metrics. You need to:
1. Identify where sound bothers you (clap test).
2. Add soft stuff there (rug, curtain, panel).
3. Listen and adjust.
Start with one action: “This weekend, I’ll place a thick rug under the coffee table.” Experience the difference. Then add curtains. Then consider one panel. Progress compounds. Think of it like gardening—you don’t plant the entire yard on day one. You start with one bed, learn, and expand. Each small win builds confidence and reveals the next logical step. The framework provides guardrails; your ears provide the feedback. Trust your perception: if it sounds better, it is better.
“I Don’t Want to Spend a Fortune”
Acoustic comfort is scalable. The $50 rug delivers disproportionate value. The $20 door sweep solves a major leak. View investments through the lens of daily impact: How many hours per week do you spend in this room? How much does the current acoustic issue diminish your enjoyment or cause strain? A $150 solution that improves 15 hours of weekly relaxation has immense value. Prioritize using the budget tier table. Remember: DIY solutions (properly executed) perform nearly as well as commercial products. Time invested can offset financial cost. And many solutions—like rearranging furniture or adding plants—cost nothing but intention.
Alternatives and When They Fall Short: Separating Fact from Fiction
The internet abounds with “hacks.” Let’s evaluate common suggestions with acoustic physics:
* Egg Cartons: Myth. Dangerous. Egg cartons create more problematic reflections due to their shape. They are highly flammable and can harbor mold. Never use them. This misconception persists due to visual similarity to diffusers, but the physics is entirely wrong.
* “Acoustic” Paint: Minimal Impact. Paints with additives claim sound absorption. Independent testing shows negligible real-world improvement. You’d need impractical thickness to matter. Save your money and effort for proven solutions. Paint is for color; absorption requires porous depth.
* Hanging Blankets Randomly: Partially Effective, But… A thick blanket does absorb sound. However, effectiveness plummets if not hung taut and close to the wall. It also looks temporary. For renters, the tension-rod curtain method is far more effective and aesthetically controlled. Blankets are best used as temporary testers before committing to permanent solutions.
* Filling Walls with Insulation (Without Other Upgrades): Limited Benefit Alone. Adding insulation to a standard stud wall improves isolation only marginally. Significant isolation requires a system: mass, decoupling, and damping. Don’t expect miracles from one component. Focus efforts where you get the biggest bang for buck: windows and doors.
When evaluating any product or method, prioritize those with tested Noise Reduction Coefficients (NRC) or Sound Transmission Class (STC) ratings from independent labs. These provide objective measures of performance, cutting through marketing claims. Reputable acoustic product manufacturers readily provide these test reports. If ratings aren’t published, be skeptical.
Your Questions, Answered
Q: How do I know if my room has an echo problem? Is there a simple test?
A: Yes—the clap test is reliable and immediate. Stand where you normally sit. Clap your hands sharply once. Listen carefully:
Clear “slap” echo (distinct repeat): Strong reflection issue. Prioritize absorption at reflection points.
Lingering “wash” of sound (a decay that feels too long): Excessive reverberation. Prioritize broad absorption (rug, curtains, panels).
Sound stops cleanly:* Acoustics are likely well-balanced. Focus on specific issues (bass, noise intrusion) if present.
For deeper analysis, free smartphone apps exist, but the clap test is sufficient for most homeowners to identify needing treatment.
Q: Can plants really improve room acoustics?
A: Plants provide marginal acoustic benefit but significant psychological and aesthetic value. A single plant has negligible absorption. However, a dense cluster of large plants (e.g., 3-4 floor-sized plants with broad leaves in thick soil pots) placed in a reflective corner can slightly diffuse and absorb high frequencies. More importantly, biophilic design research shows plants reduce stress and improve perceived air quality, which complements acoustic comfort. Use plants as part of a holistic comfort strategy—not as a primary acoustic solution. Pair them with proven absorbers for best results.
Q: I have an open-plan living room/kitchen/dining area. Where do I even start?
A: Open plans are challenging but manageable. Focus on zoning:
1. Define the Living Zone: Place a large area rug under the sofa and chairs. This anchors the space acoustically and visually.
2. Create a “Sound Shadow”: Position a tall bookshelf (filled with books) or a room divider between the kitchen and living seating area. This blocks direct noise paths from clattering dishes or appliances.
3. Target Key Reflections: Treat first reflection points on the walls within the living zone. Add absorption to the ceiling above the seating area (acoustic clouds).
4. Manage the Source: In the kitchen, use rubber mats under appliances, close cabinet doors gently, and consider a quiet-range hood. Small behavioral changes in the source zone reduce demand on the living zone treatment. Start with the rug and bookshelf divider—they yield the most noticeable improvement for open plans.
Q: Are thick curtains enough to solve window echo and outside noise?
A: Curtains are a powerful multi-tool but rarely a complete solution alone. For internal echo: Heavy, floor-length, pleated curtains significantly reduce reflections off glass—a major echo source. They are highly effective as part of Layer 1. For outside noise: Standard curtains offer minimal isolation. True acoustic curtains (with dense core layers) provide meaningful reduction for mid/high frequencies (voices, traffic tire noise) but less for low rumbles (trains, bass). For severe noise, combine acoustic curtains with secondary glazing or window plugs. Curtains are essential, but layer them with other solutions for best results.
Q: How many acoustic panels do I actually need?
A: There’s no universal number—it depends on room size, existing surfaces, and goals. A practical approach:
Strategic Placement > Quantity: Two well-placed panels (at first reflection points) outperform four randomly placed ones. Start with:
* 2 panels at side wall first reflection points
* 1 panel on rear wall behind seating
* 1 panel on front wall (if bare, beside TV)
Test and Iterate: Install these four. Perform clap test. If echo persists, add panels to ceiling (clouds) or remaining bare wall sections. Stop when the reverb feels comfortably reduced. Over-treating creates a dead room. Let your ears be the final judge.
Q: Will acoustic treatment make my room too quiet or “dead”?
A: Properly balanced treatment should never make a room feel unnaturally quiet. The goal is clarity, not silence. If a room feels “dead”:
1. You likely over-absorbed—removed too much high/mid-frequency energy.
2. You neglected diffusion (Layer 2). Add diffusive elements: a filled bookshelf on the rear wall, textured wall art, or architectural details.
3. Re-test with speech and music. A well-treated room should feel:
* Speech: Effortless to understand, even at normal volumes.
* Music: Full-bodied, with clear separation of instruments, not muffled.
* Ambiance: Calm and focused, not oppressive.
If it feels dead, remove one absorption panel and replace it with a diffuser. Balance is key.
Q: Can I treat acoustics without putting holes in my walls?
A: Absolutely. Renters and preservationists have excellent options:
Freestanding Panels: Mount panels on sturdy easels or stands. Position at reflection points.
Tension Rod Systems: Hang panels or heavy fabric between tension rods placed floor-to-ceiling in corners or against walls.
Furniture Strategy: Maximize large upholstered furniture against reflective walls. Use deep bookshelves filled with books as absorbers/diffusers.
Rugs and Curtains: These require no wall modification and deliver significant impact.
Ceiling Clouds on Stands:* Some manufacturers offer cloud panels mounted on adjustable floor stands.
Focus on floor, furniture, and temporary wall solutions. You can achieve substantial improvement with careful non-invasive strategies.
Q: Does furniture arrangement really affect sound?
A: Profoundly. Furniture is your room’s first line of acoustic defense. Strategic placement leverages existing items:
Sofa Against Bare Wall: Creates a reflective “slap” behind listeners. Pull sofa 6-12 inches from wall; add a console table with decor behind it to break up the surface.
Glass Coffee Table: Highly reflective. Place a thick fabric runner or large book on top to dampen reflections.
Empty Corners: Can amplify low frequencies. Fill with a tall plant in a thick pot, a floor lamp with a fabric shade, or a small bookshelf.
Symmetry: For media-focused rooms, symmetrical furniture placement relative to the TV/speakers creates a balanced sound field. Avoid cramming all seating on one side.
Rearranging costs nothing and can resolve minor issues before buying a single product.
Q: How long does it take to notice a difference after adding treatment?
A: The change is often immediately perceptible for reflection/reverberation issues. After placing a rug and curtains, the clap test will sound noticeably drier. Dialogue clarity improves within minutes of adding panels at reflection points. For noise isolation (Layer 3), the difference is apparent the next time external noise occurs. Bass issues may require more iterative adjustment, with noticeable improvement after each step. The most significant shift is psychological: the reduction in subconscious auditory stress—less leaning in to hear, less volume adjustment—creates a sense of calm that deepens over days as your nervous system adapts.
Q: Is acoustic treatment only for people who watch lots of movies or listen to music?
A: Not at all. While media enjoyment is a common catalyst, the benefits permeate all living room activities:
Conversation: Reduced reverberation means less vocal strain, easier hearing for children or elderly guests, and more relaxed socializing.
Remote Work: Clearer video calls with less echo picked up by your microphone.
Reading/Relaxation: Lower ambient noise floor reduces cognitive load, making it easier to focus or unwind.
Family Life: Contains toy noise or sibling chatter within the room, reducing disturbance to others.
Well-being: Studies link reduced noise pollution to lower stress levels and improved mood. Acoustic comfort is fundamental human-centered design—it supports how we live*, not just how we consume media.
Q: Where can I find reliable product recommendations without biased reviews?
A: Seek resources that prioritize education:
Manufacturer Test Data: Reputable companies publish independent lab test reports (NRC, STC) for their products. Compare these numbers directly.
Acoustic Society Resources: The Acoustical Society of America (ASA) offers public resources on basic principles.
University Extension Programs: Some architecture/engineering departments publish unbiased guides.
Critical Review Reading: When reading reviews, look for specifics: “Reduced echo in my 15×20 ft room with hardwood floors” is more valuable than “Sounds great!” Check if the reviewer describes their room size and existing surfaces.
Focus on understanding principles (NRC ratings, placement strategies) so you can evaluate any product objectively.
Q: How does room size affect acoustic treatment needs?
A: Room size influences strategy but not core principles. Smaller rooms often have more pronounced bass issues (room modes) due to shorter wavelengths interacting with boundaries—prioritize bass traps in corners. Larger rooms typically suffer more from reverberation due to greater distances between reflective surfaces—prioritize absorption on walls, ceiling, and floor. However, surface materials (hard vs. soft) often matter more than pure dimensions. Always start with the clap test to identify your room’s specific behavior rather than assuming based on size alone. A small room with all hard surfaces may need more treatment than a large room filled with soft furnishings.
Conclusion and Your Next Step
You began this guide aware of subtle frustrations—a strained conversation, an echoey footstep, the constant battle with TV volume. You now hold a complete framework to transform those frustrations into intentional comfort. The 3-Layer Acoustic Comfort Framework—Absorption to soften reflections, Diffusion to scatter sound naturally, and Isolation to manage noise flow—isn’t just theory. It’s a practical, adaptable system validated across countless living rooms, from compact urban apartments to sprawling open-plan homes. You’ve learned to diagnose specific problems with simple tests, prioritize solutions based on your budget and living situation, integrate treatments seamlessly with your design aesthetic, and avoid common pitfalls and myths. This knowledge shifts you from passive occupant to active environmental designer.
Recap: The Three Pillars of Acoustic Comfort
- Strategic Absorption is Foundational: Target first reflection points, floors, and windows with rugs, curtains, and panels. This addresses the majority of clarity issues. Remember: balance is key—avoid over-absorption.
- Thoughtful Diffusion Creates Livability: Use bookshelves, architectural details, or art diffusers to scatter sound evenly. This restores natural spaciousness and prevents the “dead room” effect, making the space feel larger and more inviting.
- Targeted Isolation Manages Boundaries: Seal gaps at windows and doors first. Add mass where noise intrudes most. This protects your sanctuary without requiring structural overhauls. Small sealing efforts yield disproportionate comfort gains.
These pillars work synergistically. Absorption clears the sonic canvas; diffusion adds dimension and warmth; isolation defines the space’s acoustic boundaries. Mastery lies not in perfection, but in progressive refinement—listening, adjusting, and honoring your unique space and needs.
The 24-Hour Rule: One Small Action to Start Today
Knowledge without action remains potential. Within the next 24 hours, complete one tangible step. Choose the option that feels most achievable:
* If echo is your issue: Measure your seating area. Order a thick area rug with a dense felt/rubber pad online, or visit a local store to feel samples. Place it under your coffee table tonight.
* If outside noise bothers you: Purchase a high-quality door sweep ($15-$30). Install it on your main exterior or interior door before bed. Notice the difference tomorrow morning.
* If TV dialogue is unclear: Tonight, enable “Dialogue Enhancement” or “Clear Voice” in your TV settings. Then, place a folded thick blanket vertically against the wall directly behind your main seating position. Watch a show. Hear the difference?
* If you feel overwhelmed: Perform the clap test. Stand in your favorite chair. Clap once. Listen. Simply naming what you hear (“hollow,” “sharp echo,” “clean”) builds awareness. Write it down. This is your baseline.
This single action breaks inertia. It proves progress is possible. It builds momentum for the next step. Acoustic comfort is built incrementally, one intentional choice at a time.
The Bigger Picture: How Acoustic Comfort Transforms Daily Life
Beyond clearer movies and easier conversations, mastering your living room’s acoustics cultivates deeper human benefits. A sonically balanced space reduces the invisible cognitive load of filtering noise, lowering stress and freeing mental energy for connection and creativity. It fosters presence—when voices carry effortlessly, conversations deepen. When ambient sound feels intentional, not chaotic, the room becomes a true sanctuary. For families, it supports neurodiverse members sensitive to sound. For remote workers, it creates a calmer backdrop for focus. For everyone, it reaffirms that your home is designed for you—a place where comfort is woven into every sensory detail. You’ve invested in aesthetics, ergonomics, and lighting. Now, you’ve completed the circle with acoustics. The result isn’t just a better-sounding room; it’s a more humane, restorative, and joyful living environment. The echoes of daily life soften. Connection deepens. Comfort becomes audible.
Explore Our Complete Home Comfort System:
Designing a Conversation-Friendly Living Room Layout | The Renter’s Guide to Non-Permanent Home Upgrades | Choosing Rugs for Style, Comfort, and Sound Control | Soundproofing vs. Acoustic Treatment: Clearing the Confusion | Creating a Multi-Functional Living Space That Works for Everyone | The Science of Biophilic Design: Bringing Nature Indoors for Well-Being | Mastering Home Lighting Layers for Ambiance and Function